Some Windows users are encountering a weird problem where the W S A and D keys are swapped with the arrow keys. Although the issue is not exclusive to a particular Windows version, it’s mostly reported to occur on Windows 10.
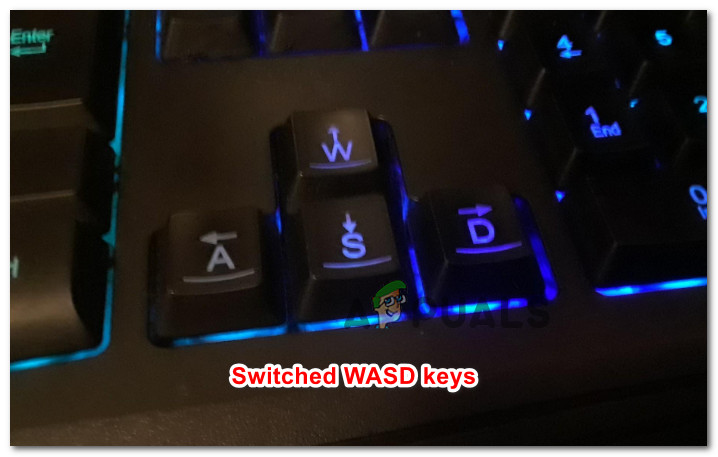
What is causing the “WASD and Arrow Keys are Switched” issue?
We investigated this particular issue by looking at various user reports and the repair strategies that affected users have successfully used to resolve the problem. Based on our investigations, there are a couple of fairly common culprits that are known to trigger this particular issue:
If you’re currently struggling to resolve this particular issue, this article will provide you with several troubleshooting guides. Down below, you’ll discover a collection of methods – each of them is confirmed to be effective by at least one user that struggled to resolve the same problem.
Keep in mind that not all the methods below will be applicable to your particular scenario, so make sure that you follow the methods below in order and exclude those that can’t be replicated on your machine.
Method 1: Unplugging / Plugging the keyboard
For some users, the fix was as simple as unplugging the keyboard, then plugging it back in again. This is confirmed to be effective with medium to high-end keyboards that are using a dedicated driver rather than a generic one.
We advise you to plug the keyboard into a different USB port to force your OS to set up the driver again for a different port. If your keyboard was previously plugged into a USB 3.0 port, try plugging it into a USB 2.0 port and see if you still experiencing the same behavior. Note: You should be able to identify the USB ports in order to do this.
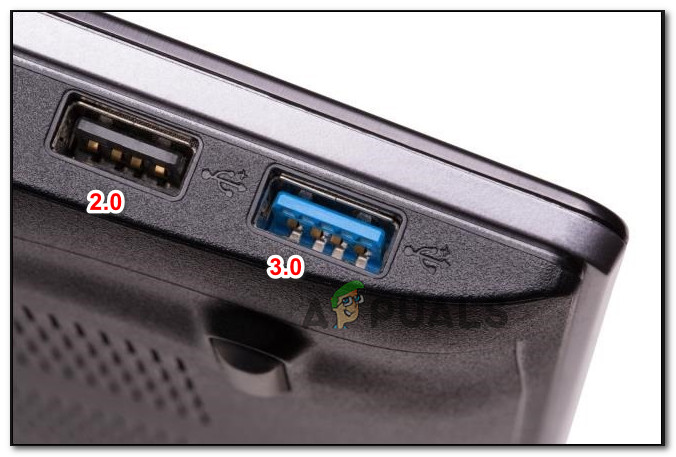
If you’re still encountering the issue even after plugging the keyboard into a different port, move down to the next method below.
Method 2: Disabling the alternate keys settings
Another popular scenario that will trigger this apparently weird behavior is if the user mistakenly triggers the Alternate Key settings. This feature is present on a lot of medium to high-end keyboards (especially mechanical keyboards) including Cooler Master, Ajazz, RedDragon, and Digital Alliance.
In most cases, this alternate keys setting will apply instantly and without any warning. This means that if you’re unfortunate enough to press the right key combinations (while gaming or doing another activity) you won’t be able to tell what caused the issue.
Fortunately, on most keyboards, you can toggle between the standard-setting and the alternate key setting by pressing FN + W keys. If that doesn’t work, here are a couple of other key combinations that are known to disable the alternate keys settings:
- FN + Windows key
- Press and hold FN + E for 5 seconds or more
- FN + Esc
- FN + Left key
If this method was not applicable and you’re still encountering the same issue, move down to the next method below.
Method 3: Using AutoHotkey to remap the arrow keys
If none of the methods above have allowed you to resolve this particular problem, you have no other choice but to download the AutoHotKey utility and use it to run a script at every system startup. This might not seem like the most convenable solution, but it’s an effective way of resolving the issue while using minimal system resources.
Here’s a quick guide on installing the Autohotkey utility and creating the script that will remap the arrow keys:
- Visit this link (here) and click on Download. Then, click on Download AutoHotkey Installer to start the download.
- Open the AutoHotKey installation executable and follow the on-screen prompts to install it on your computer. Click on Express Installation if you want to speed up the process.
- Once the installation is complete, click Exit.
- Right-click on a free space on your desktop, choose New and then select AutoHotkey Script from the list.
- Name the newly created script to whatever you want.
- Right-click on the newly created script and choose Edit Script.
- Paste the following code into the newly created .ahk document:a::left s::down d::right w::up q::Numpad0 c::a XButton1::alt ~capslock::Suspend ~capslock UP::Suspend `::Suspend ^!z:: WinSet, Style, -0xC40000, a WinMove, a, , 0, 0, % A_ScreenWidth, % A_ScreenHeight
- Save the code in your code editor, then close it.
- Double-click on the script that you previously created to run it.
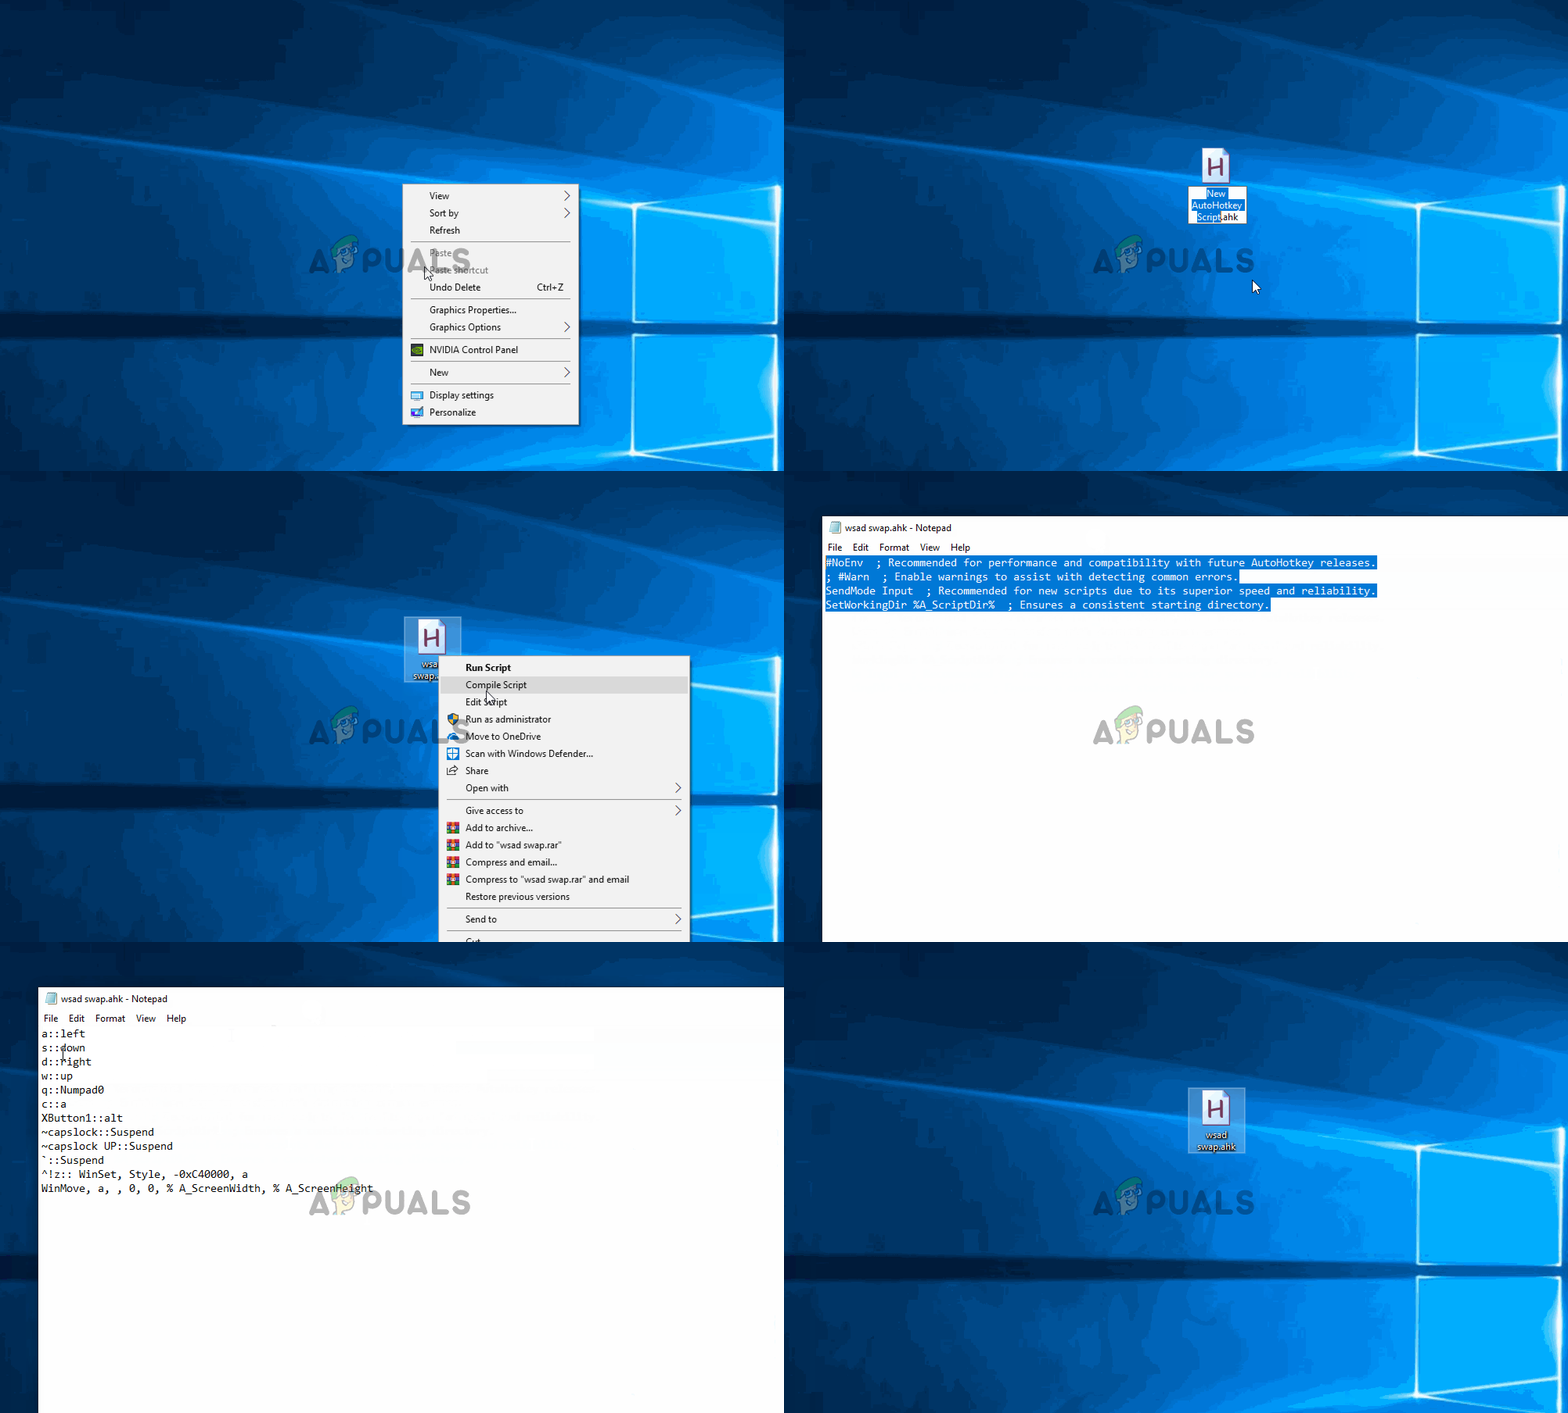
Note: Remember that you will need to run the script after every system startup to ensure that the keys are reverted back to their original behavior.
Method 4: Running Hardware Troubleshooter
It is possible that your device might have been glitched out from the computer’s side and this can sometimes prevent proper functioning of the keyboard. Therefore, in this step, we will be running the hardware troubleshooter to get rid of any such issues automatically. For that:
- Press “Windows” + “I” to open the system settings.
- In the system settings, click on the “Update and Security” option and then select the “Troubleshoot” button from the left pane.
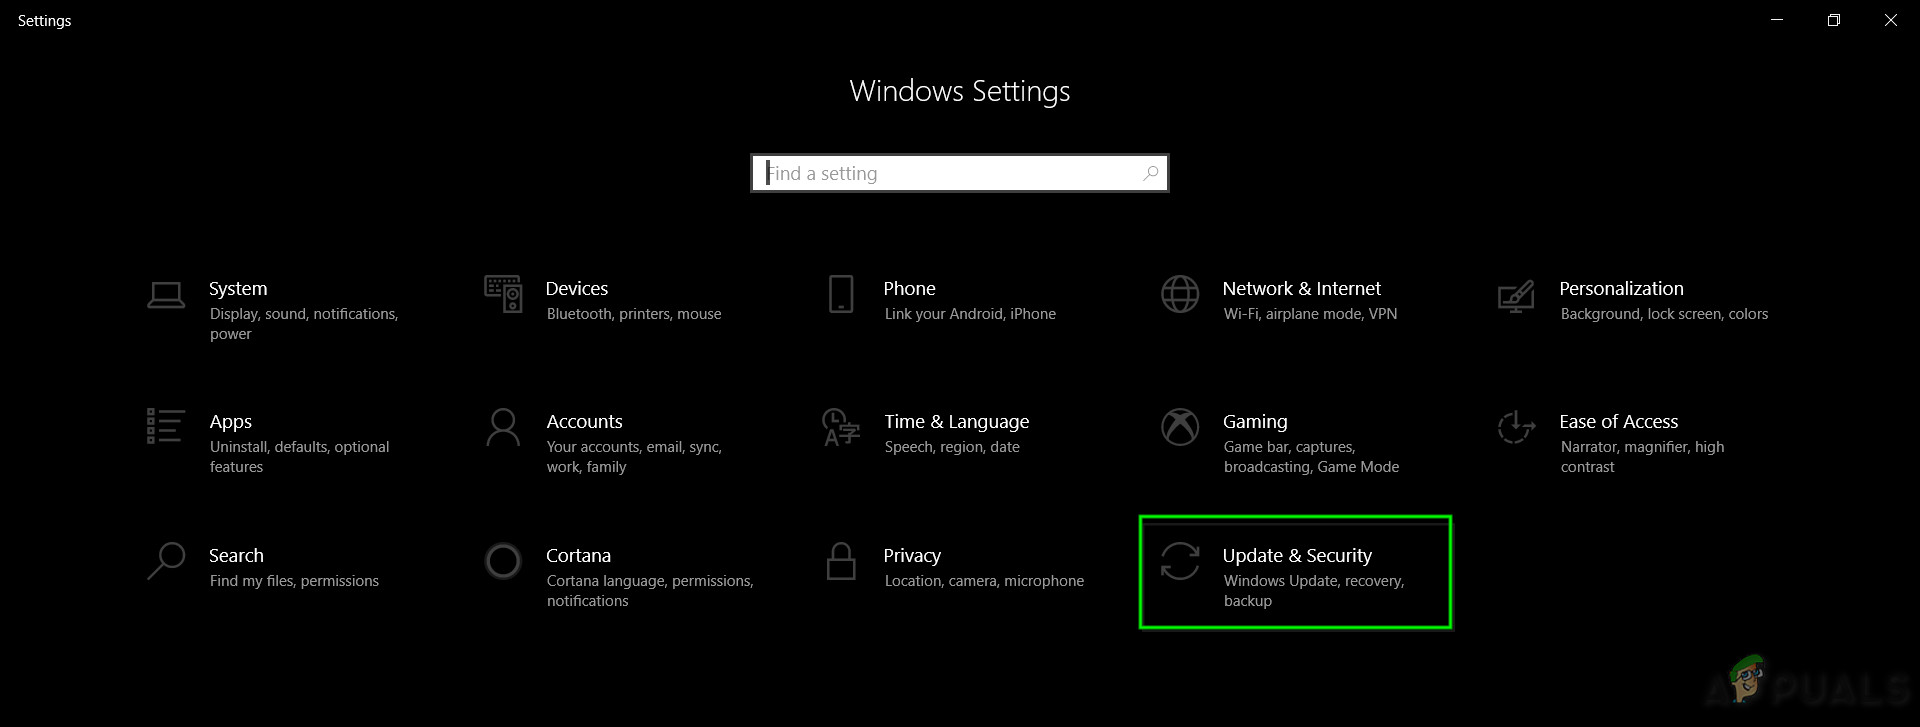
Update & Security.in Windows Settings - Scroll through the options and then click on the “Keyboard” button.
- Select the “Run the troubleshooter” button and follow through with the on-screen instructions.
- Check to see if running the troubleshooter has fixed the issue.
Method 5: Update Keyboard Drivers
In some cases, the keyboard drivers might be outdated due to which this glitch is being caused on your computer. Therefore, in this step, we will be checking to see if there are any updates available in the device manager. In order to do that:
- Press “Windows” + “R” to launch the Run prompt.
- Type in “devmgmt.msc” and press “Enter”.
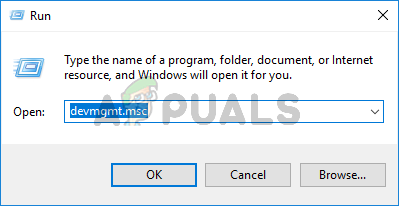
Type devmgmt.msc and Press Enter to Open Device Manager - In the device management window, expand the “Keyboard” section and right-click on your keyboard driver.
- Select the “Update Driver” option and then click on the “Search Automatically for Updated Driver Software” button on the next screen.
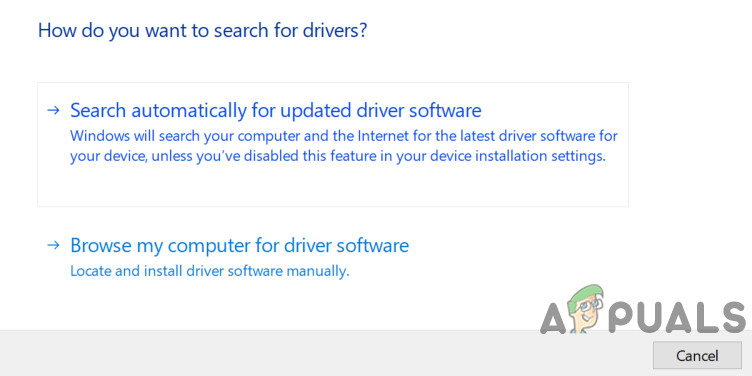
Search Automatically for Software Update - Wait while Windows searches online for the latest drivers and check to see if any are available.
- If there are any drivers available, you can try to install them by following the on-screen instructions.
- Check to see if doing so has fixed the issue with the keyboard.
Method 6: Overcoming Design Limitations
For certain keyboard models, the limit set by the manufacturer might actually be causing the issue for you. If you are facing this particular issues while gaming and pressing multiple keys, your keyboard might be the bottleneck in your case. Some keyboards are designed with a 3-Key rollover design which means that at a time only 3 keys can be registered, this can come forward as a major issue if you need to be pressing multiple keys at the same time. Therefore, it is suggested to go for a keyboard that has the N-Key rollover function. This will allow for more versatile keyboard usage.
Also, it might be possible that you are facing this issue in a browser game. If so, try to play the game in a different browser and check if the issue is still being triggered. This can sometimes also be tied back to the browser so it is wise to be rid of that.
Method 7: Fixing Browser Issue
For some users, this issue was being triggered in a specific browser and for most, it was Google’s Chrome browser that was causing this issue with browser games. Therefore, in this step, we will be troubleshooting the browser misconfiguration. For that:
- Launch your browser and open a new tab.
- Press the “Ctrl” + “Shift” + “N” keys on your keyboard simultaneously to open the incognito tab.

Chrome’s Incognito Mode - In the incognito tab, launch the game that you were facing the issue with.
- Check to see if the issue still persists.
- If the issue is fixed in the incognito tab, it means that a browser extension has been causing it on our computer.
- Therefore, click on the ‘Three Dots” on the top right corner and select “More Tools”.
- Click on the “Extensions” option and the extension manager tab will open.
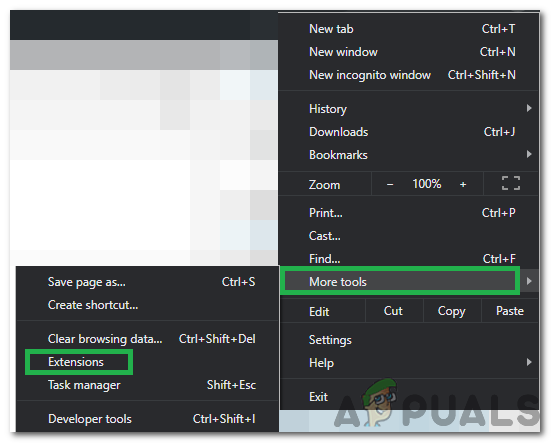
Clicking on More Tools and selecting “Extensions” - In this tab, disable all extensions and try to play the game again.
- In this way, enable the extensions one by one and note the one which makes the issue come back.
- You can either disable it permanently or try to reinstall it to fix this issue.
User Suggested Workaround:
Alex in the comment section recommended to press “FN” + “W” simultaneously and it has fixed the issue for some people. Remember to give it a go.


![How to fix error 0xc000000e windows 10 2022 100 SOLVED 19 How to fix error 0xc000000e windows 10 2022: [100% SOLVED]](https://dreamcheeky.com/wp-content/uploads/2022/06/How-to-fix-error-0xc000000e-windows-10-2022-100-SOLVED.jpg)
![how to fix Error code 0xc0000001 2022 100 FIXED 20 how to fix Error code 0xc0000001 2022 :[100% FIXED]](https://dreamcheeky.com/wp-content/uploads/2022/06/how-to-fix-Error-code-0xc0000001-2022-100-FIXED.jpg)