In this article, Dreamcheeky will be discussing how to take apart Xbox One. This process is not for the faint of heart, and we recommend that you have some experience with taking apart electronics before attempting this. Proceed at your own risk!
What You’ll Need
You will need the right equipment. These items are required to disassemble the Xbox One:
Flathead screwdriver (substitute plastic tool if necessary)
- T8 Torx screwdriver
- T9 Torx screwdriver
- T10 Torx screwdriver
- Optional but highly recommended: Plastic prying tool
How To Take Apart Xbox One
Step 1: Disconnect your Xbox One from all sources.
Your Xbox One should be completely free of any wires or attachments, including external storage, HDMI/audio cables, and the charging cable.
Step 2: Ground Yourself Before Taking Apart Your Console.
Static electricity can permanently damage circuitry. Make sure to practice proper grounding techniques, such as touching a metal surface before you start working.
Step 3: Take Out The Left-hand Side Panel.
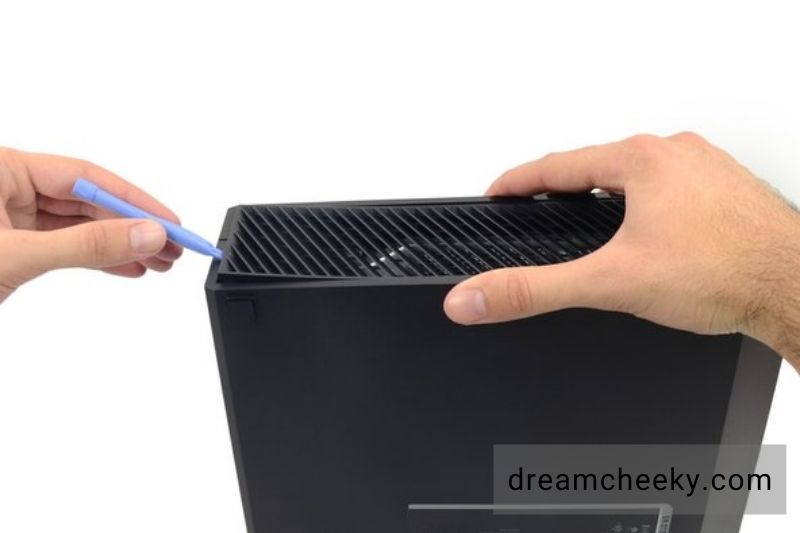
Use a flathead screwdriver, or spudger to insert the flathead screwdriver/screwdriver between the back-left corner and the plastic grille on either side of the console. Then gently pull the grille off the console.
- Because the grille is made from delicate plastic, it’s a good idea to use a plastic tool instead of a metal one.
Step 4: Slide Off The Casing Bracket From the Console.
It is located on the far right side of the grille. Slide it left until the casing bracket pulls out from the console.
Step 5: The Second Bracket Should Be Unhooked.
It is located on the far left side of the grille. Pull-on the bracket’s bottom while pressing on the top. Next, insert a flathead screwdriver in the seam covered by the warranty sticker. Finally, pry the bracket until it unhooks.
- It is easier if the console can be raised.
- Your warranty will be void if you break the warranty sticker.
Step 6: Remove The Remaining Brackets From the Casing.
The top grille section on the back of your console is where you will insert your screwdriver. Twist it until the bracket comes off. Continue this process down the console’s side. The Xbox One’s back casing will open once all brackets have been removed.
- Don’t remove the casing from the console. This will cause the ribbon connecting the front of the Xbox One to the circuit board to come undone.
Step 7: Lift The Top of Your Casing.
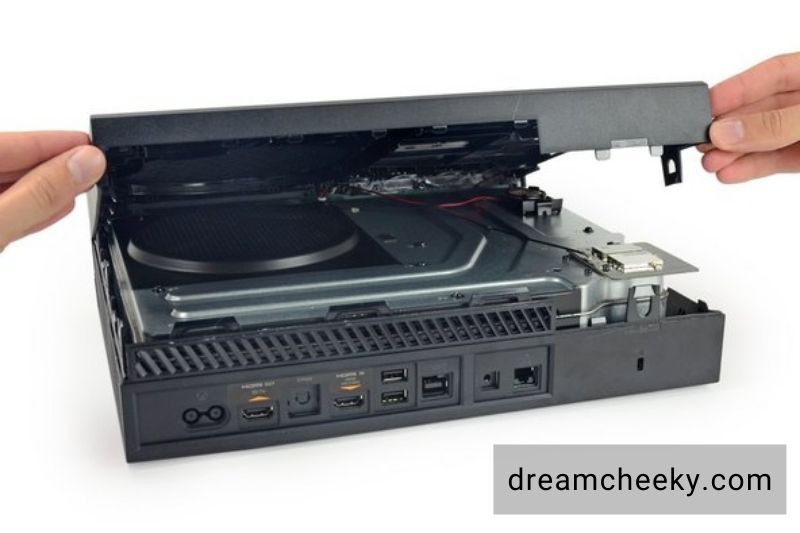
Make certain the Xbox One is flat on its back with the bottom facing down. The casing’s top should be lifted and lowered until it reaches 90 degrees to the bottom of the Xbox One console.
Step 8: Unplug the Front Panel Ribbon Cable.
Locate the front of your cable near the “On” button on the console’s faceplate. Once you locate it, pull the blue tab around the connector upwards and then gently tug the cable left. This will remove the cable from its casing.
Step 9: Take the Top Off the Xbox One’s Casing.
Since all connectors have been removed, you should be able to do this with no resistance.
Place the casing in a dry, safe place.
Disconnect speaker and Wi-Fi wires. Pull-on the wires gently to unplug them from the front.
Step 10: Unscrew Your Wi-Fi Card.
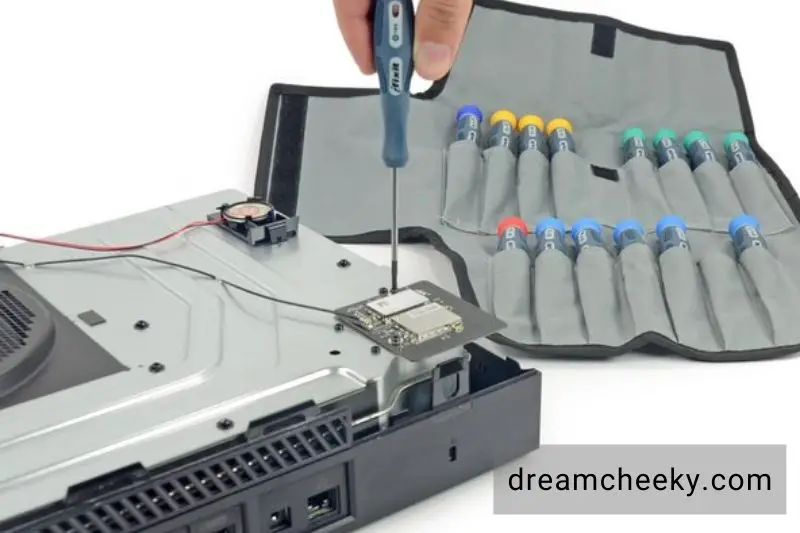
Use a Torx T8 screwdriver. If the Xbox One’s front is facing you, the Wi-Fi card can be found in the lower-left corner.
Step 11: Take Out the Wi-Fi Card.
Pull the card up from underneath. This will remove the Wi-Fi card’s plug from the Xbox One’s internal circuit board.
- Place the Wi-Fi card in the same spot as the Xbox One’s top.
Step 12: Take Out the Screws From the Metal Case.
For this, you will need your T9 or T10 Torx wrenches. To open the Xbox One’s metal case, you will need to take it off. There are eight screws that must be removed. You’ll see a “C” light next to each screw.
- The fan box has two screws at its bottom.
- To ensure that they don’t get lost, make sure to place them in a bag.
Do you want to learn How to clean Xbox One? Click here.
Step 13: Gently Lift the Metal Case.
Hold the fan corner of your case and pull it diagonally up so the cable in the next corner isn’t damaged.
- Do not force yourself to do this. If you feel resistance, don’t force it.
Step 14: Unplug the Cable.
This cable connects the Wi-Fi card and the console’s circuitry. Gently pull the connector (which is white) away from the port that it’s plugged in. The top of the case will be completely removed from the Xbox console.
- Place the metal case aside, with the cable facing up.
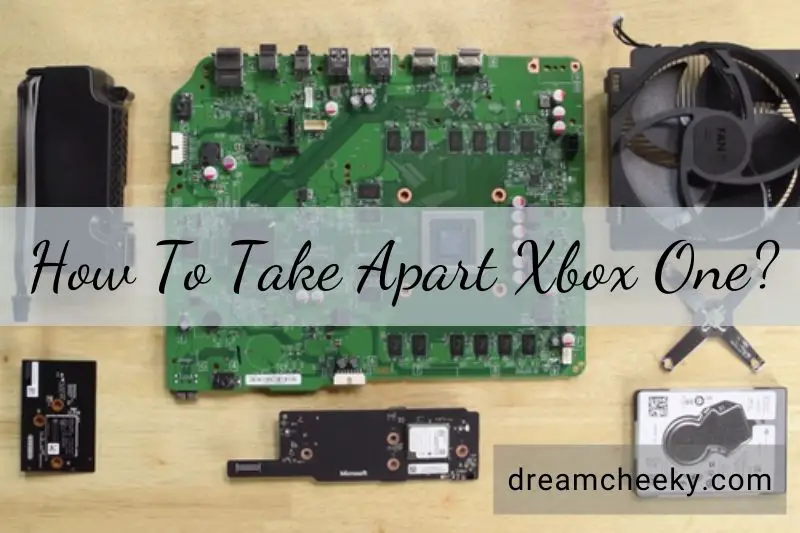
Step 15: Check Out the Internal Components of Your Xbox One.
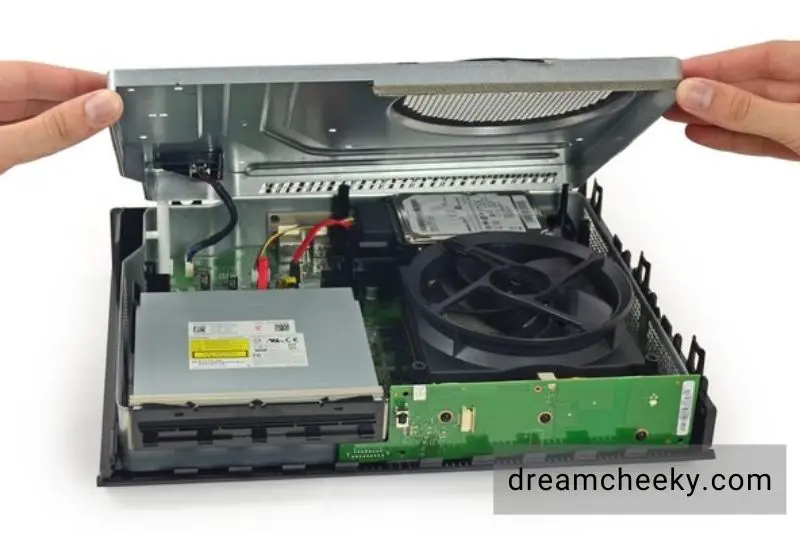
This is our first glimpse at the Xbox One.
That was simple. You can simply lift the entire Xbox One assembly from the lower case.
While we love a mystery wrapped in an enigma and hidden within a hobbit hole, it is important to repair things when they are more simple.
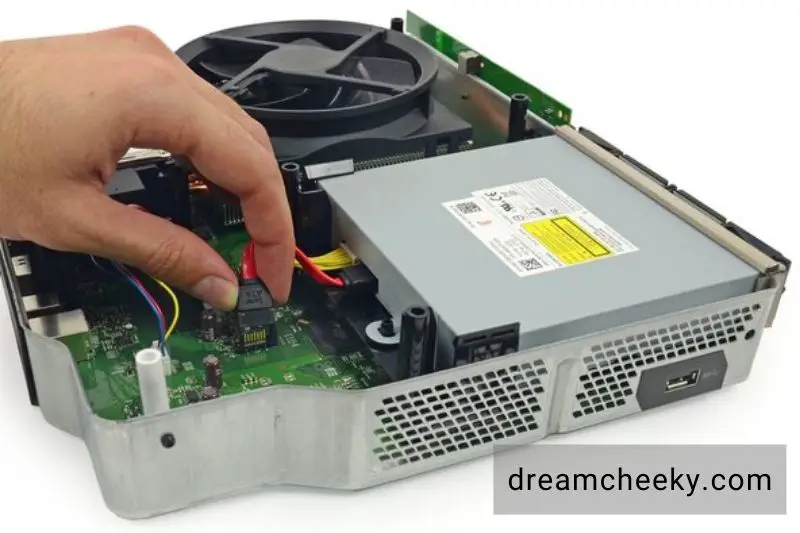
Another win for repairability is that the Blu-ray/DVD drive can be connected to the motherboard via the SATA data connector.
We are tempted to rewatch the entire LOTR trilogy again on Blu-ray but our quest to destroy the One Xbox at the teardown table seems more urgent.
We look under the optical drive and find a few ICs as well as a large ribbon cable.
- Microsoft MS0DDDSPB1 1326 – BTSL ATNGS501
- Texas Instruments 37T Avy7
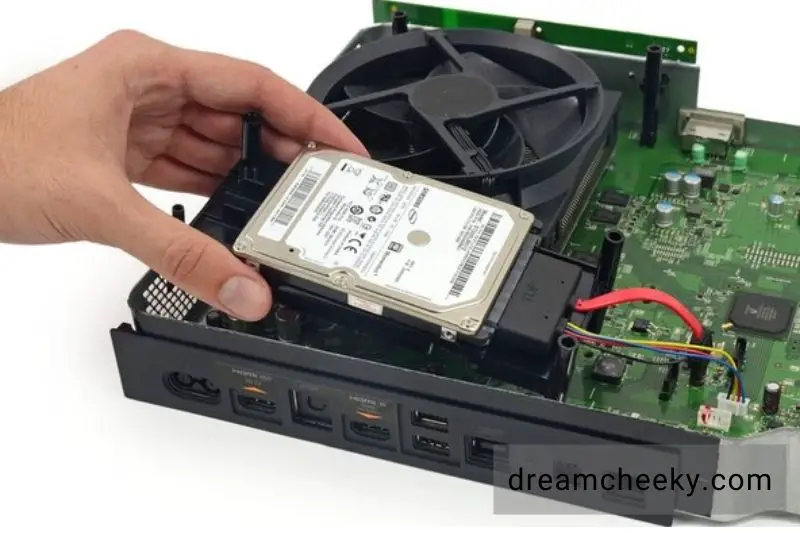
The Xbox does not have a replaceable hard disk. However, we don’t mind following the rules. It’s out.
Bad news: Replacing the hard drive will void the warranty. It’s a 2.5-inch SATA II drive. The Xbox One does not support unformatted hard drives.
Our device contains a Samsung Spinpoint M8ST500LM012 500GB 5400 RPM with 8MB cache SATA II 3.0Gb/s hard disk.
This drive seems to be well-received by Newegg.
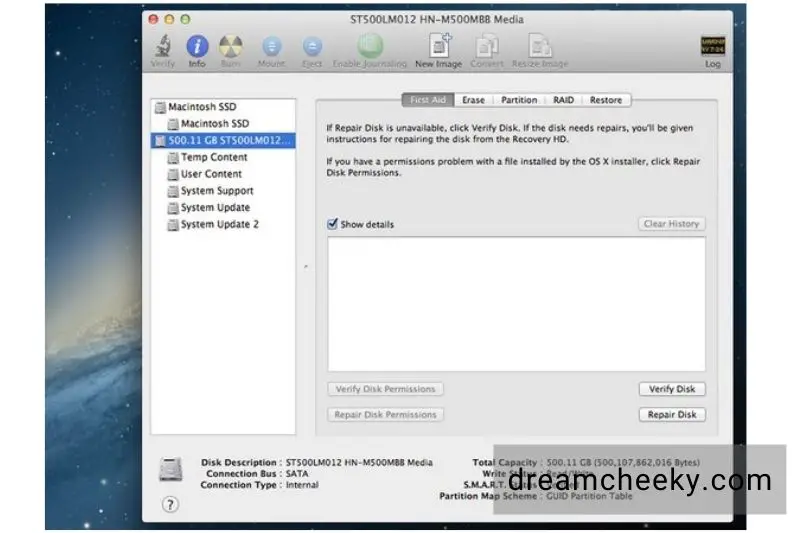
Teardown Update: The One’s hard disk was moved into one of the secondary hard drives bays for tech writers. Five NTFS partitions were found.
- Temp Content: 44GB capacity, 27.1GB available (in an Xbox we have never turned on).
- User Content: 391.9GB capacity, none used.
- System Support: 42.9 GB capacity, 34.1 GB available.
- System Update: 12.8 GB capacity, 11.8 GB available.
- System Update 2: 7.52 GB capacity, 7.47 GB available.
Unfortunately, we couldn’t go the other direction because we didn’t have a spare hard disk (in New Zealand), to insert into the Xbox One. That will be another day.
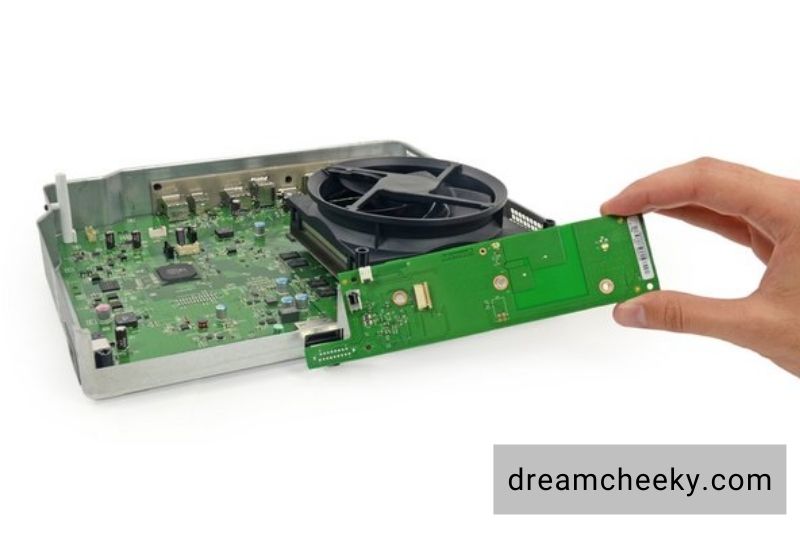
The RF Module Board is detached from the lower case.
On the back of the RF, module board is a single IC from Info storage Devices, labeled 9160F1MS03 1327 2317B057. This is the Audio User Interface chip of Nuvoton, we believe.
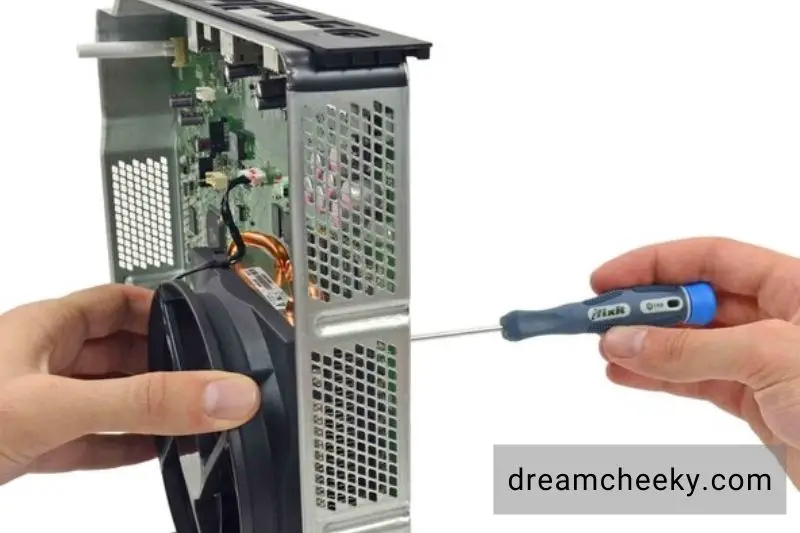
The spot is marked with an “X”. A few T9 Torx screws secure the heat sink/fan assembly to the motherboard.
We’re not surprised that this Xbox has a robust cooling system after the red ring of Death.
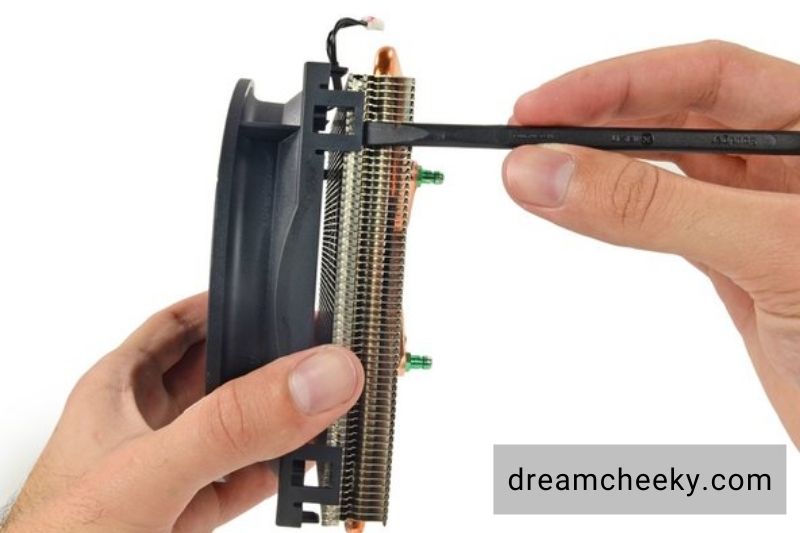
We are happy to inform you that if your new Xbox One has cooling problems, it is possible to replace the heat sink or fan.
It takes only a flick of the spudger for the fan to be separated from the heat sink at 112 mm.
This is one small step towards repairability, but one big one to replace.
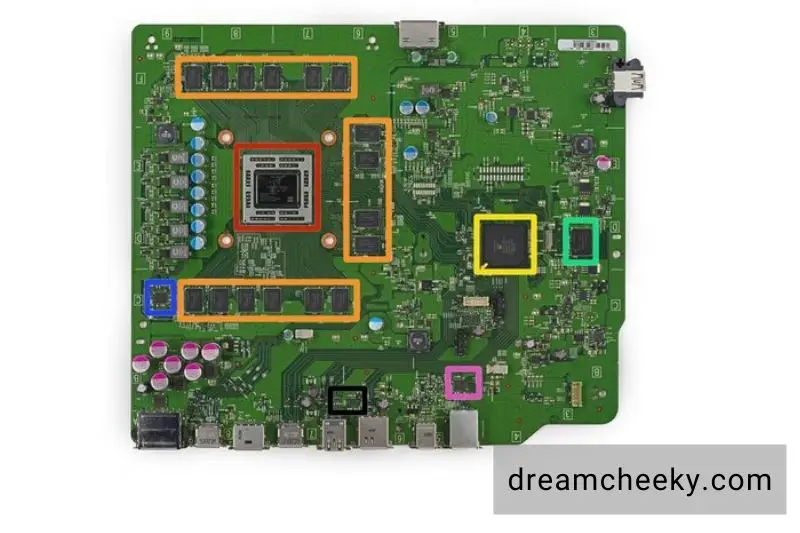
What can our elf eyes see? An army of integrated circuits. These are the big hitters:
- X887732-001 DG3001FEG84HR (includes AMD “Jaguar” 8-core CPU + AMD Radeon Graphics GPU)
- 16x SK Hynix H5TQ4G63AFR 4 Gb (512 MB) DDR3 SDRAM (total of 16 x 512 MB = 8 GB)
- X861949-005 T6WD5XBG-0003
- SK Hynix H26M42003GMR 8 GB eMMC NAND Flash
- ON Semiconductor NCP4204 GAC1328G Integrated Power Control IC
- Realtek RTL 8151GNM Ethernet Controller
- Texas Instruments TPS2590 3-V to 20-V High Current Load Switch
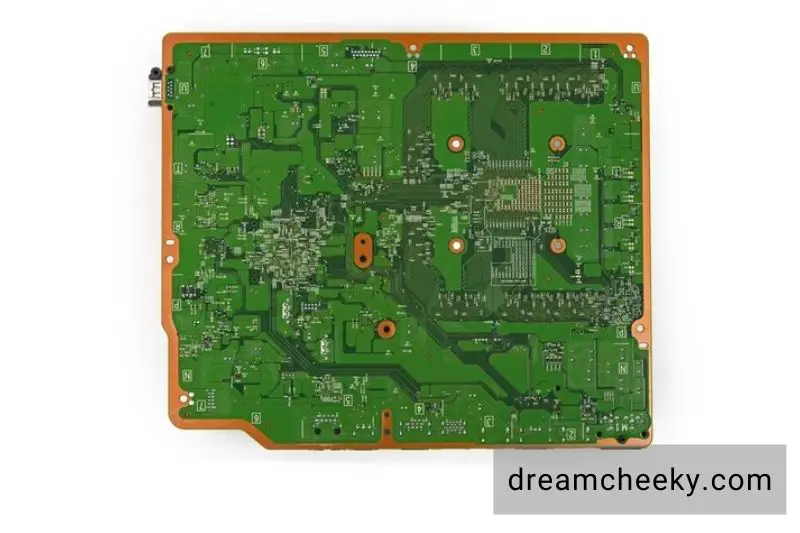
The motherboard’s backside is a beautiful, green area, devoid of any integrated circuits.
We are grateful to Chipworks for helping us identify the names of the various doodads found in the Xbox console.
With that, game time is over! Let’s tally up this console’s repairability score.

