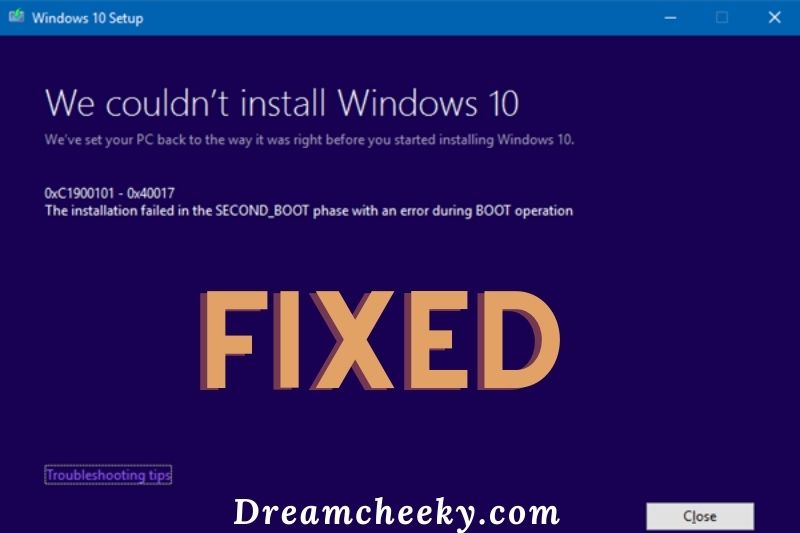
If you’re trying to upgrade to Windows 10 and you see an error, don’t worry – you’re not alone. Many users have reported seeing various errors when attempting to upgrade, but there are a few simple fixes that should get you up and running in no time.
Cause of Windows 10 Upgrade Error
The most common reasons why Windows 10 updates fail are:
Multiple updates in queue: This is a common reason for Windows to fail. If this happens, rebooting and trying again can result in a successful upgrade. Other minor and unpredictable issues can be solved with the same fix.
Low drive space: A Windows 10 update won’t work if your computer doesn’t have enough drive space. Windows will report an unsuccessful update. Clearing space is usually enough to fix the problem.
- Files containing corrupt updates: Usually, this will fix the problem. To clear these files, you may have to enter Safe Mode.
- Hardware conflicts: There may be a device that is interfering with the update. The update might be completed if you unplug any unnecessary peripherals.
- Driver conflicts: This issue is similar and has an identical solution. Reconnect all peripherals (printers, USB hubs) and then try the update again.
Consider creating a Windows 10 backup before you start. You can always restore your backup to try again in the worst case.
How to Fix Windows 10 Update Failed Errors
Try rerunning Windows Update
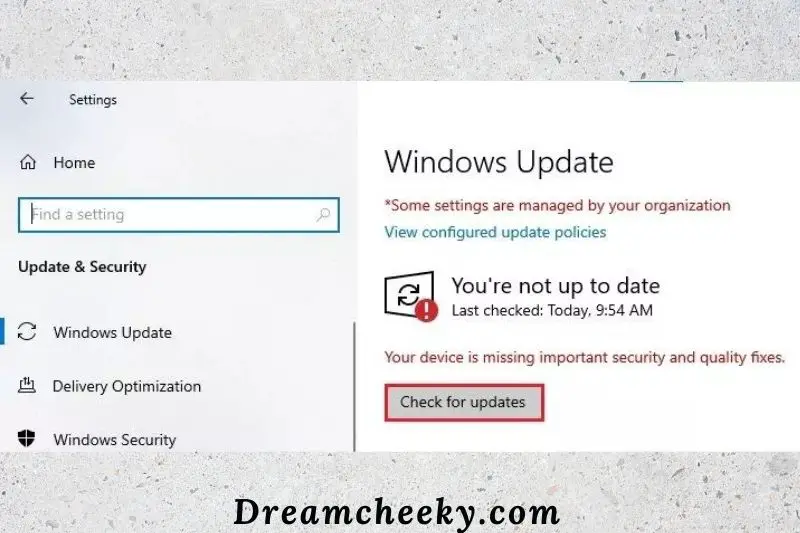
Many times, a simple reboot and rerunning the update can fix your problem. Windows 10 can fail to install updates if there are multiple in the queue. You can normally get the system working again by restarting the update process and starting it again. You may have to restart Windows 10 multiple times if your Windows 10 installation has become outdated.
Unplug your peripherals and reboot
If the update fails to work, it could be a driver or hardware conflict. Before you reboot, unplug all peripherals such as webcams and microphones. Run Windows Update once you have only the minimum amount of keyboard and mouse connections.
Check your available drive space
Sometimes Windows 10 installation fails because of a lack of disk space. Although the PC will usually reserve some space for updates there is always a chance that it runs out. Clear space by moving data to an external drive or deleting data that isn’t needed.
Follow these steps to check if your system has enough space.
- To open Windows File Explorer, press Windows + E.
Go to This PC, right-click on the C: drive, and go to Properties to check the disk space.
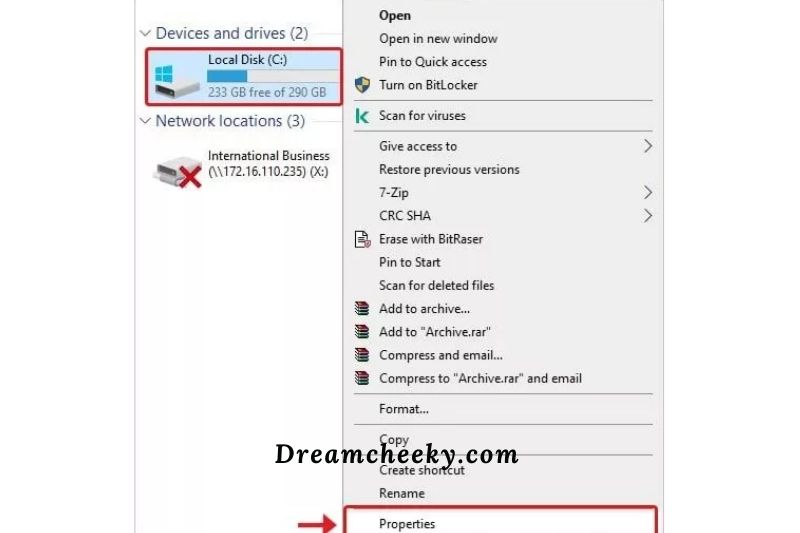
Disk Cleanup can be used to clean up disk space. Follow the instructions.
- Navigate to Windows File Explorer and navigate to This PC >C: > Properties.
- Under the General tab, click Disk Cleanup.

- Follow the instructions on the screen and choose Clean up system files.
- Click OK to select the file types that you want to delete.
- You can also uncheck Previous Windows Installation (s), and click OK.
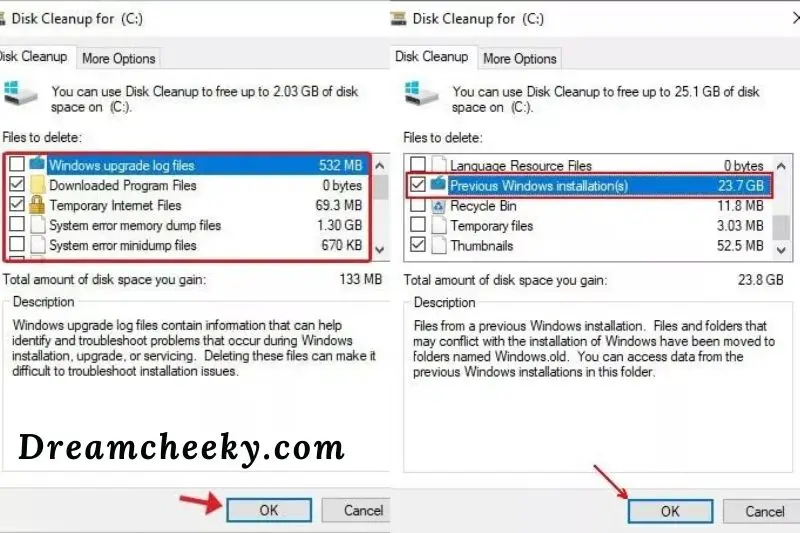
- After you’re done, you can try the upgrade again.
Stellar Data Recovery for Windows can quickly recover files that you have accidentally deleted. This DIY software can be downloaded to recover data that has been lost due to formatting errors, deletions, or corruption.
Use the Windows 10 troubleshooting tool
Run Windows Update Troubleshooter
Verify that all Windows Updates have been installed on your system. If you are having problems upgrading to Windows 10 after installing all updates, run Windows Update Troubleshooter. These are the steps:
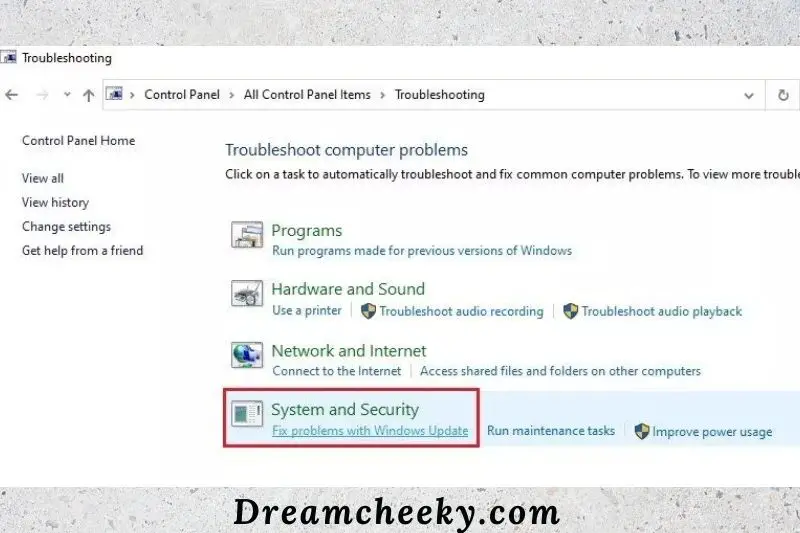
- Open Control Panel and go to View by to change the size to large icons
![]()
- Open Troubleshooting and search.
- Navigate to System and Security and then click Fix problems with Windows Update.
- The ‘Windows Update’ wizard opens. Click “Next.”
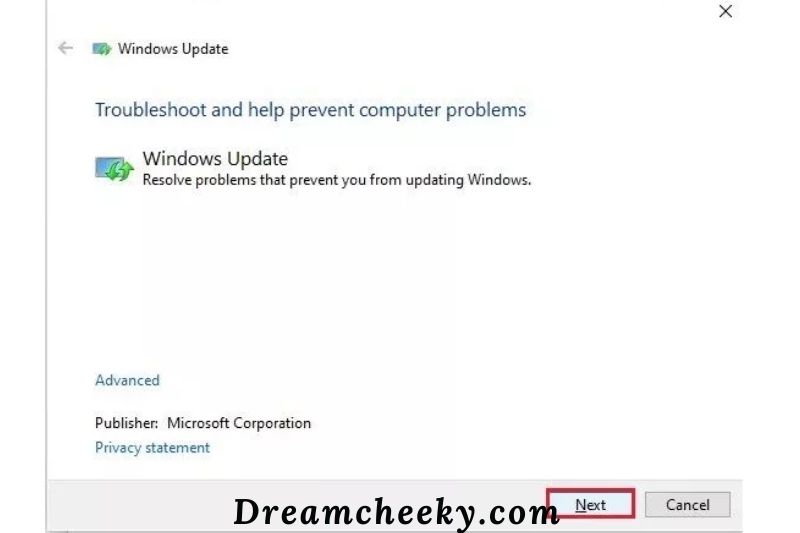
- Windows Update Troubleshooting will begin.
Follow the instructions on the screen and wait for the process to complete.
Pause Windows 10 Updates
This will temporarily halt updates. It will usually delete any updated files from your computer. You can then download new files to complete the update process.
- Navigate to Settings > Update and Security > Windows Update.
- Select Advanced Options
- Click Pause Updates to turn the toggle on.
- Restart your computer.
- Return to Settings > Updates and Security > Windows Update.
- Select Advanced Options
- To turn off Pause Updates, click the toggle.
- Try rerunning Windows Update.
Manually delete your Windows Update files

This will usually delete all Windows Update files. If it does not, you will have to manually delete your SoftwareDistribution folder.
- Start your computer in Safe Mode.
- Navigate to C:\Windows\ using File Explorer.
- Locate the SoftwareDistribution folder and delete it.
- Start your computer and then run Windows Update.
Download and install the latest update manually
If Windows 10 is still not updating, go to the official Download Windows 10 page and click Update Now. After the download finishes, save the file and then run it.
Note: If you are trying to update a major feature, this process won’t work. You can try a security update by going to the Microsoft Update Catalog and searching for the KB number.
Use the System File Checker
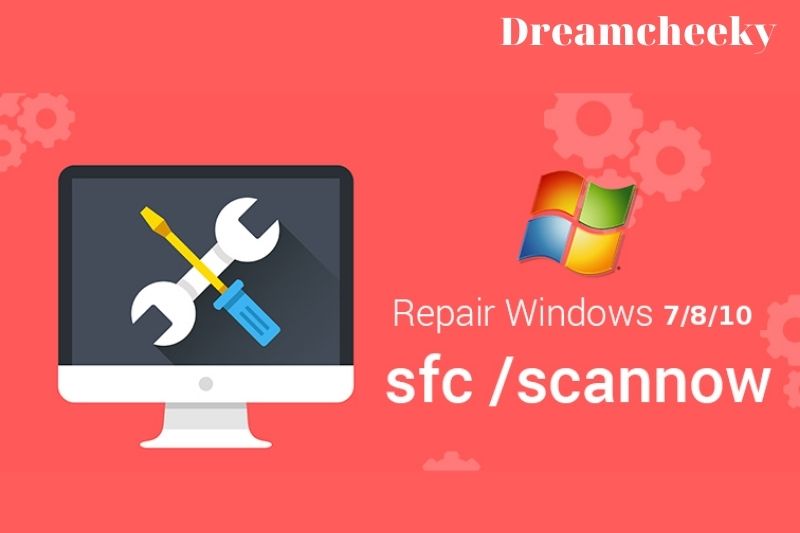
This is a sign that Windows 10 may be having problems. To check for and possibly repair any problems, run the System File Checker. Once it is done, reboot your computer to try to update it.
Repair your Windows 10 installation
The System File Checker may not be able to fix a problem in your Windows 10 installation. Next, perform a reset or a complete reinstall. All your files will be retained. This is one step away from a clean installation of Windows. It’s quite drastic.
Before you start, backup your settings and files. Also, make sure that you select the Keep My Files option during the repair.
Remove External Peripherals and Restart PC

You may have faulty devices attached to your computers, such as scanners, printers, headphones or USB drives. This could cause problems when you upgrade to Windows 10.
If this happens, unplug the peripheral device and reboot the system to try again to upgrade to Windows 10. You can also unplug any non-essential hardware from your system and then restart it.
Uninstall Third-Party Antivirus Software
An error message indicating that Windows 10 upgrade failed may be caused by a third-party antivirus. The problem can be fixed by uninstalling or turning off the antivirus software.
How to remove the third-party antivirus software
- To open System Settings, press Windows + I
- Navigate to Apps > Features and locate the third-party antivirus software.
- Click on the antivirus software, then click Uninstall.
- After that, reboot your computer and then upgrade to Windows 10.
Disable Windows Defender Firewall if you are using it. This can expose your system to malware attacks. After disabling your firewall, it is recommended that you avoid browsing the internet and downloading any program or software.
How to disable Anti-Malware Firewall
- Open Windows Defender Firewall by going to Control Panel.
- Click Turn Windows Defender Firewall On or Off.
- Click OK to select Turn off Windows Defender Firewall (not Recommended) under “Domain network setting, Private network settings and Public network settings”.
- Now, let the process finish and then restart your computer. Try now to upgrade to Windows 10
Uninstall Outdated/Non-Essential Software
An error message indicating that Windows 10 upgrade failed may appear if you have non-essential or outdated software. Start by uninstalling any such software or programs from your computer. Follow these instructions to do this:
- Open Control Panel and navigate to Programs. Click ‘Uninstall a Program.’
- Click on the button to go to Programs and Features.
- Right-click the program you wish to uninstall and select it.
- To confirm and restart your system, click ‘Yes‘
- Try now to upgrade your Windows.
Run Bootrec Tool
You may have problems upgrading to Windows 10 because of possible corruption in MBR (Master Boot Records), a boot sector or boot configuration data. You may use the BOOTREC tool to update the MBR (Master Boot Records), partition boot sector code and fix the BCD.
Follow these steps to do this:
- Turn on your computer by connecting Windows 10 bootable media.
- You can access the Boot Menu option by pressing F12/Del on the Boot key.
- Click ‘Repair your Computer’ to continue and then select ‘Advanced Options’ from the Automatic Repair screen.
- Next, go to Troubleshoot > Advanced Options > Command Prompt.
- Type the following commands in the Command Prompt:
bootrec /fixmbr
bootrec /fixboot
bootrec /rebuildbcd - This will resolve the BCD problems. You can now upgrade to Windows 10
These DIY solutions will fix the “upgrade to Windows 10 failed” error. If you are unable to fix the problem, you will need to reinstall Windows 10. If you are unable to resolve the error, you will need to make a backup or use a Windows Data Recovery Tool to recover data. Then, reinstall Windows on your computer/laptop.
Check for BIOS Version

The BIOS is an important part of system upgrades. It’s responsible for starting up the system and connecting to vital devices like the keyboard, mouse, disk controllers, and other devices. An outdated BIOS can cause problems when upgrading Windows.
This is especially true for older devices built before Windows 10. Many PC manufacturers offer updates for BIOS keys after Windows 10 was released in 2015. These BIOS updates were specifically designed to fix the Windows 10 upgrade problem. You can resolve your Windows 10 upgrade problem by simply updating the BIOS.
- Check your BIOS version to make sure it is correct
- To open the Run Dialog box, press Windows+R
- Type msinfo32 into the dialog box, and then press Enter or OK.
This will open the system information window. Look under the System Summary tab for the BIOS Version/Date.
You might have to update your BIOS if the BIOS date is older than 2016. Check your manufacturer’s website to see if there is an update. You will likely receive the BIOS upgrade if your system isn’t too old. Many systems that have passed their support deadlines still received the new BIOS code at Windows 10 release.
Run The Built-in Compatibility Checker in Windows Setup
Modern feature updates are usually very fast, but some upgrades can take quite a while. It can be frustrating to find out that after an hour or so, the system has reversed the update and restored the previous Windows version without giving any indication as to what the problem was.
You can skip this step by running Windows Setup with a pair of switches. This instructs Windows Setup to run a compatibility test and return the results. You will need access to all Windows installation files as described in the previous section.
Open File Explorer (Windows Explorer 7), and take a note of which drive letter was assigned to the virtual or external drive where you have Windows installation files.
Next, open a Command Prompt dialog box by pressing Windows + R. To open the Run dialog box, type cmd.exe. Then press Ctrl+Shift+Enter and it will run as administrator. The following commands can be typed at the command prompt. After each command, press Enter.
d:
Setup/Compat ScanOnly
As if you were upgrading, follow the setup screens. Click Install when you reach the last screen. This will close the program and not start the upgrade. When it does, it writes some information to a file called BlueBox.log, which you’ll find in the C:\Windows\Logs\MoSetup folder.
Double-click the file to open it with Notepad. Scroll down to the bottom to find the last error code. You’re good to go if you see 0xC1900210. This means that there are no blocking compatibility problems.
You will need to determine the meaning of any error codes you see. These are the most common errors.
- Compatibility issues (hard block): 0xC1900208
- Not available for migration (auto upgrade).
- Not compatible with Windows 10 system requirements: 0xC1900200
- Insufficient disk space: 0xC190020E
You can find more information about compatibility blocks and a link to how to fix them.
Check the Setup Logs After a Failed Installation
You might feel tempted to do another Windows 10 upgrade after you have failed with the first attempt. This is the classic definition of insane: repeating the same thing over and expecting different results.
SetupDiag is Microsoft’s official diagnostic tool. It can help you determine the cause of the problem. The tool works on Windows 7, Windows 8.x and Windows 10. However, it must run on Windows 10 and Windows 10.
You might also need to install.NET Framework 4.6 to make it work properly. SetupDiag examines the large log files Windows creates every time it attempts to upgrade. It then gives you the most likely reason for the failure.
Go to this page to download SetupDiag.exe if your Windows 10 feature or upgrade fails. You can always refer to the instructions on that page by keeping it open. You will also find links to information for decoding error codes.
Double-click SetupDiag.exe and copy it to the folder where Setup failed. You don’t have to provide any command-line switches to the current version of SetupDiag.exe. It will automatically search for log files in common locations.
SetupDiag’s output is a plain text document that is saved in exactly the same folder as its program file. To examine the output of SetupDiag, you can use any text editor including Notepad to open it.
Fix Error 0x80073701
Fix Error 0x80073701 While Installing Updates
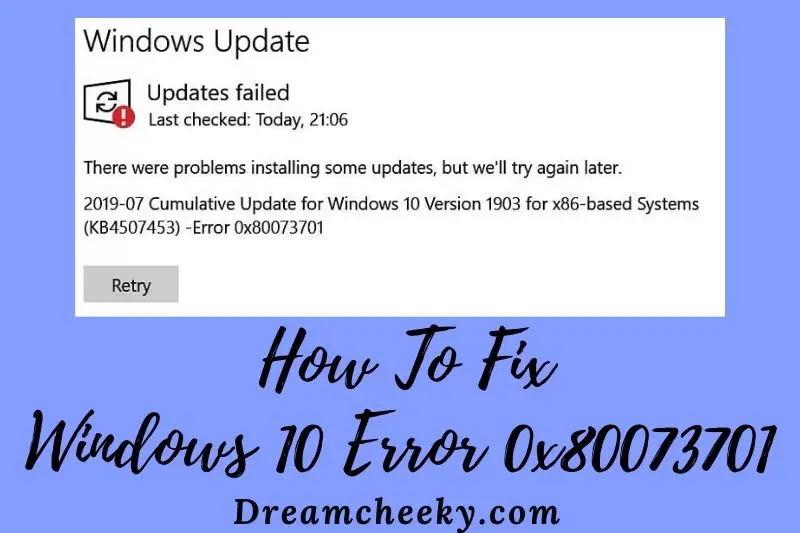
If you’re seeing the 0x80073701 error when you try to install updates, it might be caused by a corrupted file. Here are some troubleshooting ways that can help you fix the issue:
- Run System File Checker
- Run DISM Tool
- Check Logs and Remove Patches
- Restart Your Computer
- Restart the Update Services
- Manually Download the Updates
- Disable Background Programs
- Flush the SoftwareDistribution Folder
- Perform a Deployment Image Servicing and Management (DISM) scan
Note: some errors have a familiar fix, so we do not mention them again
Run DISM Tool
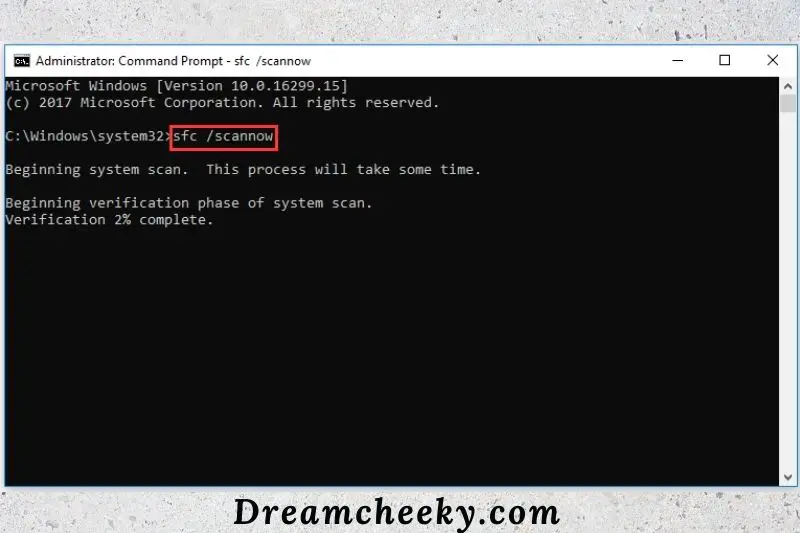
We will now demonstrate the second solution for the 0x80070301 error. To fix corrupted system files, you can use the DISM utility.
Step 1: Open Command Prompt
Run the Command Prompt as administrator. Please refer to the above-mentioned first solution for more details.
Step 2: Type your command
To continue, enter the command DISM/Online/Cleanup-Image/restorehealth in the pop-up window. Also, you can use the command – DISM /Online /Cleanup-Image /Startcomponentcleanup.
Next, restart your computer and verify that the Windows update 0x80073701 error has been fixed.
Check Logs and Remove Patches

This section will now show you the third way to fix the error code 0x80073701. This will allow you to remove patches from the CBS.log.
CBS.log contains logs that track components’ installation and uninstallation during updates. If you get the error code 0x80073701 you can open the CBS.log.
Thus, open the CBS.log, search the error_sxs_assembly_missing and check if there is any KB update related to it. Reinstall the program and then run Windows Update again to confirm that the issue 0x80073701 has been resolved.
If the CBS.log is error-free, you can execute the following command.
DISM /Online /Cleanup-Image /ScanHealth
This command can detect corruption in component stores. After the command is completed, restart Windows Update to verify that the Windows update error code 0x80073701 has been resolved.
Disable Background Programs
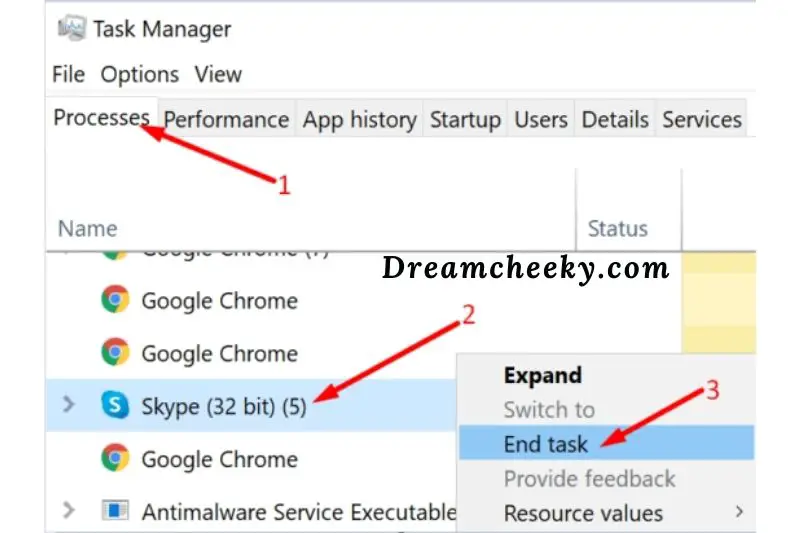
Start Task Manager and click on the Processes tab to identify any apps or programs that are running in the background. To close these programs, select End Task.
Temporarily disable security tools if you are using a third-party anti-virus or malware program. Third-party antivirus programs can sometimes prevent Windows Update from working.
Flush the Software Distribution Folder
To clean the SoftwareDistribution, make sure that the Microsoft Store isn’t running. To ensure that this fix doesn’t get blocked by the Microsoft Store, reboot your computer.
- To open Run, simultaneously hold down the Windows+R keys.
- \Next, open the Run dialog box and type CMD. Hold down Ctrl+Shift+Enter to open the elevated Command Prompt.
- Type net stop wuauserv into the Command prompt window and hit Enter.
- Then, type in rd /s /q %systemroot%\SoftwareDistribution and press Enter to clear the Update cache folder.
- Finally, enter net start wuauserv then press Enter.
Perform a Deployment Image Servicing and Management (DISM) scan
The Deployment Image Service and Management (a.k.a. DISM) is a command-line tool that can be used to service Windows Images. This tool can be used to fix corrupt system files.
- To open Run, simultaneously hold down the Windows+R keys.
- Next, open the Run dialog box and type CMD. Hold down Ctrl+Shift+Enter to open the elevated Command Prompt.
- In the Command Prompt window, type in DISM /Online /Cleanup-image /StartComponentCleanup and press Enter.
- In the Command Prompt window type DISM/Online/Cleanup/Image/ScanHealth and hit the Enter key.
- Next, type in DISM/Online/Cleanup-Image/restorehealth. Then press the Enter key.
- Restart your computer and then try to update Windows.
Fix Windows Update Error 0xc1900223
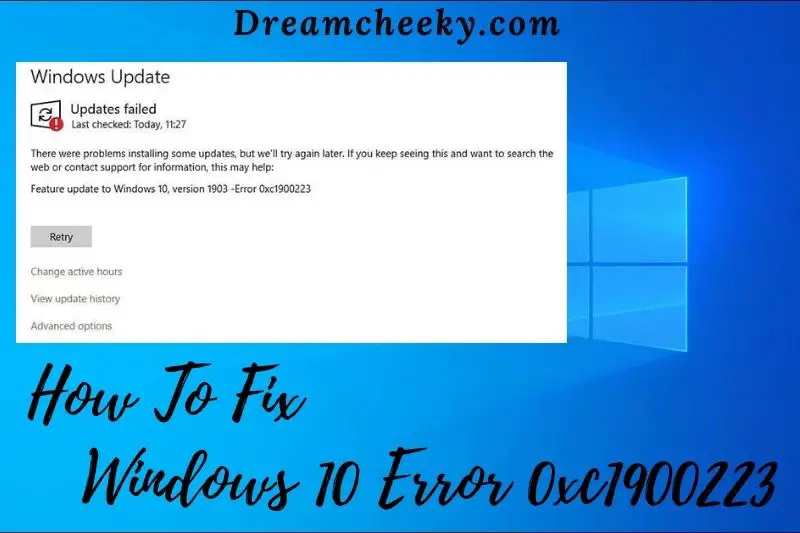
Why Is My Windows Update Not Working?
Although an internet connection problem is one of the reasons for a Windows update error, it is not the only one. There are a few other reasons why a Windows update can fail. Let’s have a look at the few reasons why Windows Update fails.
- The Microsoft update server could not be reached.
- A problem with the Software Distribution file has occurred.
- Windows Update Services is not available.
How to fix Windows Update Error 0xc1900223
If you’re seeing the 0xc1900223 error when you try to update Windows 10, it means that your computer is missing a required update. Here are some methods to fix the problem
- Run Windows Update Troubleshooter
- Run Media Creation Tool
- Disable your VPN software
- Flush the DNS cache
- Perform DISM and SFC tools
- Reset Windows update component
- Rename your HOSTS file
- Installing the update via the Microsoft Update Catalog
- Disabling Pi-Hole (or a different network-wide adblocker)
Run Media Creation Tool
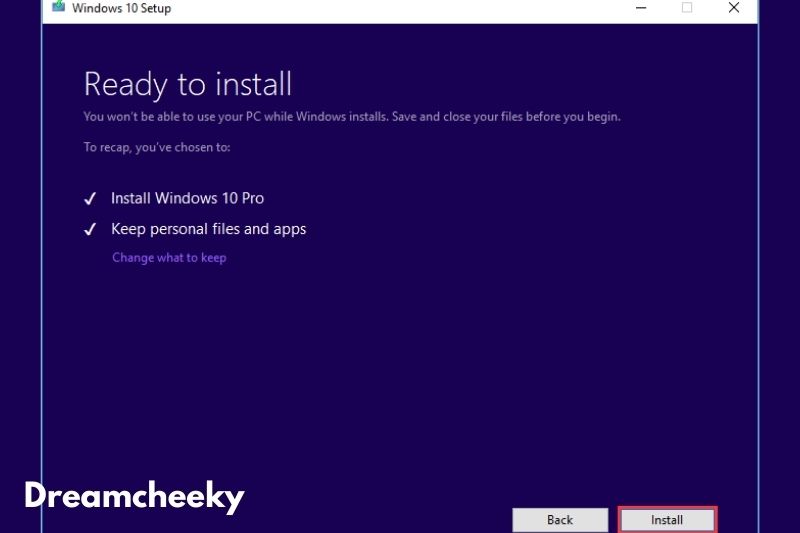
If Windows Update troubleshooter is still unsuccessful, you can use Media Creation Tool to resolve the problem.
Navigate to Microsoft’s page, then click on the Download Tool Now buttons. These buttons are located under Create Windows 10 Installation Media section.
Double-click the executable and go to the location. If UAC prompts, click Yes to grant administrative rights.
Start the Media Creation Tool on your PC and choose Upgrade This Computer Now.
Follow the instructions on screen to continue. This will save all settings, files, and apps.
After the operation is completed, restart your computer to verify that the problem has been resolved.
Flush the DNS cache
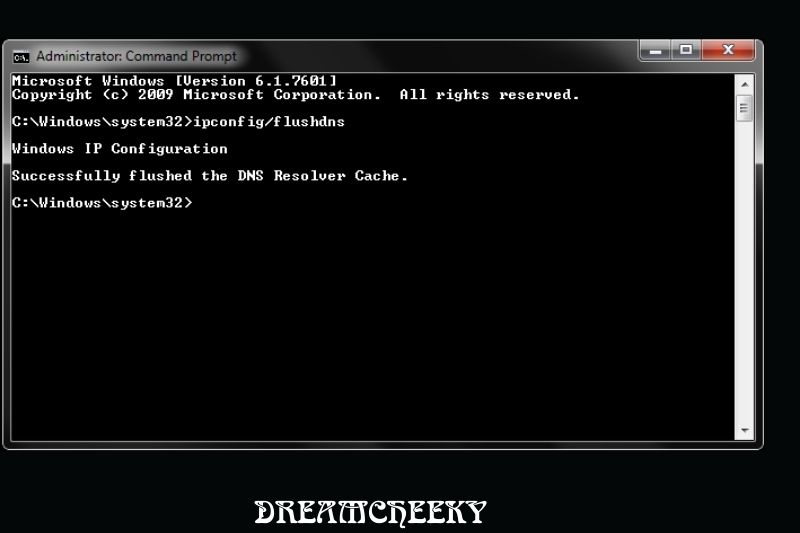
Network inconsistency can sometimes cause problems like this error code. You may have to flush the DNS cache using the command prompt. These are the steps to follow.
- Click on the Start button, then type in command prompt.
- Right-click the Command Prompt to select Run as administrator
- Click on the Yes button to grant administrative privileges if UAC prompts you.
- After each of the following text codes, enter them in the command prompt window. Hit Enter to confirm.
ipconfig /flushdns
ipconfig /registerdns
ipconfig/release
ipconfig /renew
Once the commands have been successfully executed, reboot your computer and verify that the problem has been solved.
Reset Windows update component
If none of the above solutions work, and the problem persists, it could be a Windows update bug. If this happens, you will need to reset Windows Update components using commands. This will reset Windows Updates settings to default.
Restart your computer after resetting the components file.
Disable your VPN software

Sometimes, VPN software can cause problems with Windows Update. You can disconnect from a VPN connection that you use to connect to your work network. If applicable, turn off VPN software and then try to upgrade again.
Rename your HOSTS file
If you have trouble disabling VPN software or don’t use VPN, you can rename the HOSTS file.
Open the folder C:\Windows\System32\Drivers\Etc
Change the name of HOSTS to HOSTS.OLD. To rename the file, you will need to consent (admin consent). When prompted, click Continue.
To clear Windows DNS cache, open a Command Prompt and type the following command:
ipconfig /flushdns
Try installing Windows Updates again.
After that, change HOSTS.OLD to HOSTS. You should also inspect your HOSTS file to ensure you aren’t blocking Microsoft Update server addresses.
Disabling Pi-Hole (or a different network-wide adblocker)
Pi-Hole, or another similar network-wide adblocker, can trigger the 0xc1900223 error code during Windows 10 updates. Other users have reported that this problem can be caused by a DNS blocking list, which might prevent the update from proceeding.
Users who were in the same situation as you have reported that they were able to install the update without any errors by disabling or uninstalling Pihole while it is being performed.
- Disabling Pi-Hole Temporarily
To open a Run dialog box, press Windows key + R. Next, type “cmd” and hit Ctrl + Shift+ Enter to open an elevated CMD prompt that grants admin access. Click Yes to grant administrative privileges when you are prompted by the UAC.
To invoke the Pi-Hole utility, enter the following command once you are inside the elevated CMD prompt:
pihole
After Pi-Hole is invoked, enter the following command and hit Enter to disable it
pihole disable
After the Pi-Hole Adblocker Utility is disabled, try to install the update that failed again. See if it fails without the 0xc1900223
To enable Pi-Hole again, after the update has been installed successfully, you can run the following command from the elevated terminal: pihole disable
- Uninstalling Pi-Hole
To open a Run dialog, press Windows + R. Next, type “cmd” into the text box. Then press Ctrl+ Shift + Enter for an elevated CMD prompt. To grant administrative privileges, click Yes at the User Account Control prompt.
To begin the removal of Pi-Hole, enter the following commands into the elevated CMD prompt and hit Enter.
- pihole uninstall
After the command has been successfully executed, you can restart your computer.
Try to install the latest update that failed with the 0xc1900223 error at the next update and check if it succeeds.
If this doesn’t work or the problem persists, you can move on to the next possible solution.
Installing the update via the Microsoft Update Catalog
If none of these methods have worked, you may be able to manually install 1903 via the Microsoft Update Catalog. This will directly install the update (without the need to involve the local WU component). This will ensure that any corrupted dependency which might be causing this problem is circumvented.
This is a quick guide to installing the 1903 Update manually using the Microsoft Update Catalog.
First, you must know the OS architecture of your computer (32-bit or 64-bit). Open File Explorer, right-click on this PC, and select Properties from the context menu.
After you have logged into the System Properties screen, look at the System Type category. If the screen says 64-bit you should download the 64-bit update. If it says 32-bit you will need the 32-bit version.
Once you have a clear understanding of your OS architecture, click this link (here). Use the search function at the top-right corner to search for “4522355” and hit Enter.
Once the result page has been generated, you can search for the version that corresponds to Windows 10 version x64-based (or x86-based), and then click on the Download button associated with the Windows Update.
To initiate the download, click the link again on the confirmation page.
Wait for the download to finish, then open the.msu file and follow the prompts to finish the installation.
Once the installation is completed, restart your computer in order to allow the files to install.
Fix Windows Update Error 0x80070003
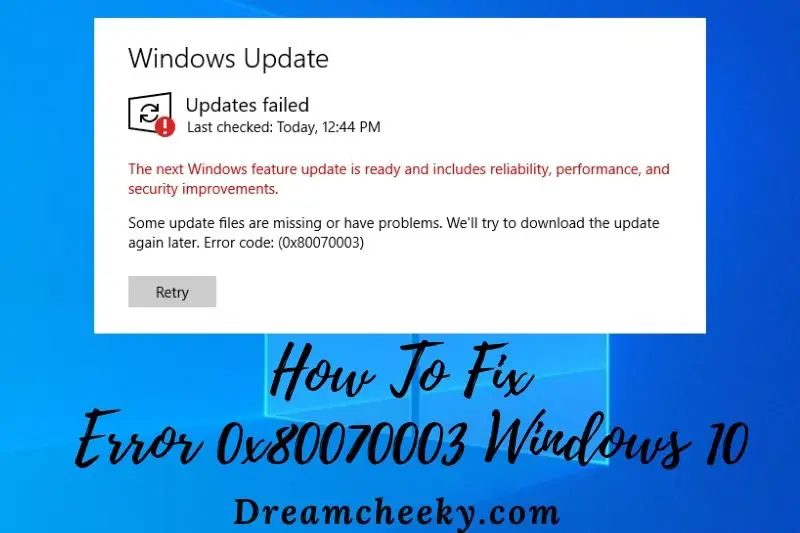
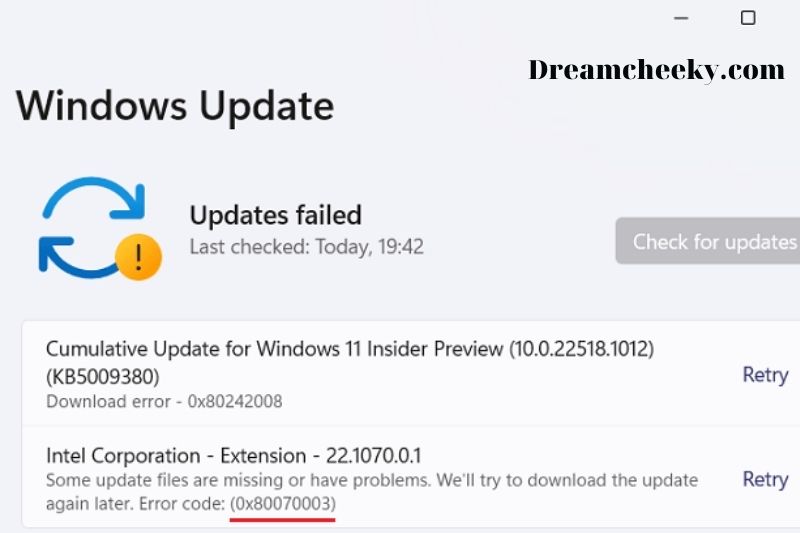
Why does Windows Update error 0x80070003 occur?
File corruption is the main reason for this error. If there is an issue with your update cache, this message will appear. Other times, the problem could be caused by corrupted system files.
Finally, Windows might not be able to update because of an issue with one of your services.
Fix Windows Update Error 0x80070003 on Windows 11/10
If you’re seeing the 0x80070003 error when trying to update Windows, it probably means that a file or directory on your system is preventing the update from going through. There are a few different ways to fix this problem, Now check below:
- Run the Update Troubleshooter
- Restart the Update Components
- Disable Your Antivirus
- Repair and Restore Broken System Files
- Download the Updates Manually
- Restart or stop the Windows Update Service
- Delete the DataStore folder
- Run DISM
- Use the Windows Update Assistant
- Use the Media Creation Tool
- Replace old Configuration file Spupdsvc.exe
- Reset Windows Update-related folders.
- Check the status of Windows Update-related Windows Services.
Disable Your Antivirus

Windows Update may be hampered by apps or programs on your device. Many third-party antimalware, firewall and antivirus software can block Windows Update. It is easiest to get rid of all third-party programs that are running on your computer. This applies to security tools, too.
You can either clean boot your device or use Task Manager to do this. Next, check to see if error code 0x80070003 persists.
Repair and Restore Broken System Files
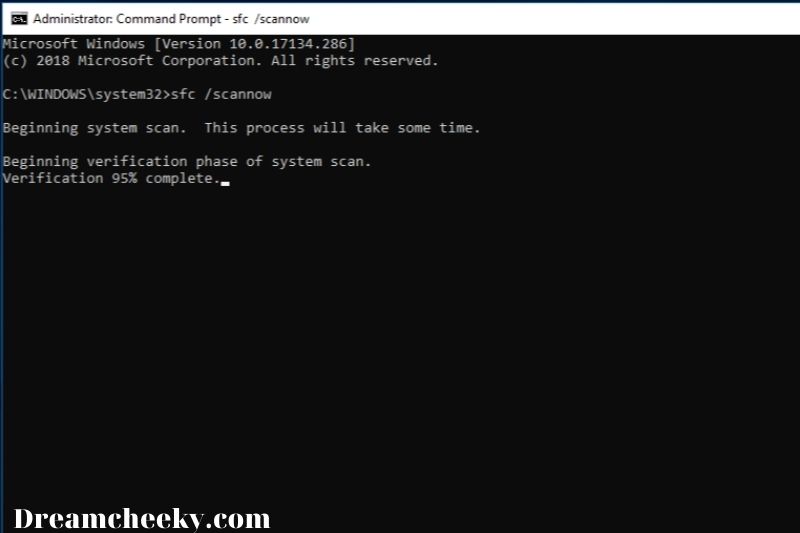
You won’t have the ability to update your system files if they are corrupted. To solve the problem, run DISM and SFC.
1. Launch Command Prompt to gain admin privileges
2. These commands can be run one at a time:
- SFC /scannow
- DISM/Online/Cleanup-Image/CheckHealth
- DISM/Online/Cleanup-Image/ScanHealth
- DISM/Online/Cleanup-Image/RestoreHealth
3. Restart your computer to check for updates.
Delete the DataStore folder
- Open your File Explorer.
- Navigate to: C:\Windows\SoftwareDistribution
- Go to the DataStore folder, and delete all files and folders.
- Go back to the SoftwareDistribution folder.
- Navigate to the Download folder and delete all files or folders.
- Reboot your computer and see if it is working.
Use the Windows Update Assistant

- Visit the official Windows 10 download site.
- Click on the Update Now button.
- After the Windows Update Assistant has been downloaded, you can run it.
- Click on the Update Now button.
- Wait for the update download to complete. This may take some time.
- After the update has been downloaded, you will be asked to restart your computer.
- Wait for the update to complete after the computer restarts.
Use the Media Creation Tool
- Visit the official Windows 10 download site.
- Click here to download the tool.
- After the application has been downloaded, you can run it.
- Accept these terms and conditions.
- Click Next to Upgrade This PC Now
- Wait for the update download to complete. This may take some time.
- Make sure you select Keep all when you reach the Choose what to keep screen.
- Follow the instructions to complete this process.
Replace old Configuration file Spupdsvc.exe
Spupdsvc.exe, a process file, is part of the Microsoft Update RunOnce Service. The process responsible for performing the update is notified when an update becomes available on the computer. A RunOnce entry for spupdsvc.exe is also added to the registry. This process takes place when the computer is restarted and the user logs in.
To execute the following command, open Command Prompt as administrator
cmd /c ren %systemroot%\System32\Spupdsvc.exe Spupdsvc.old
This will replace the current configuration of Spupdsvc.exe with a new one. Rerun Windows Updates to verify that your issue is now fixed.
Check the status of Windows Update-related Windows Services.
Windows Services are available to help with the operation of various elements within Windows 10. You might want to look into the services that support Windows Updates.
Start Windows Services Manager to locate the following services
- Windows Update Service – Manual (Triggered)
- Background Intelligent Transfer Service – Manual.
- Cryptographic Services – Automatic
- Workstation Service – Automatic.
Check their Properties to ensure their Startup type matches their name. Click on the Start button if you are unsure.
Fix 0x8024401c in Windows
Why does 0x8024401c happen on my computer?
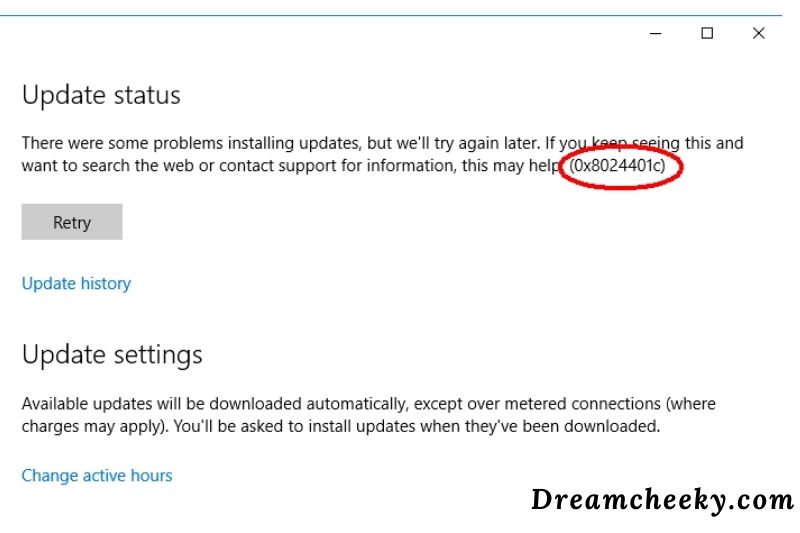
Windows can’t download or install Windows updates because it isn’t able to connect to Microsoft Windows update servers. This error code 0x8024401c occurs when Windows cannot connect. It could be caused by an internet connection problem or server timeout waiting.
Many users encountered the issue when Microsoft released Windows 10 technical preview, which was available for users to test. The problem was not limited to Windows 10 technical preview. It also affected users of older versions of Windows.
Sometimes, the problem with error 0x8024401c can be caused by the user when they don’t have an internet connection that is stable enough to download the Windows Update. This error could also be caused by missing system files or problematic drivers.
How do I fix 0x8024401c in Windows
If you’re seeing the 0x8024401c error when you try to update Windows, it might be caused by a corrupted file or a problem with your internet connection. To fix the problem, you can refer to some solutions below:
- Check the network settings
- Update drivers
- Modify the setting in Registry Editor
- Repair system files
- Perform a clean boot
- Run the SFC Scan
- Use the Windows Update troubleshooter
Check the network settings
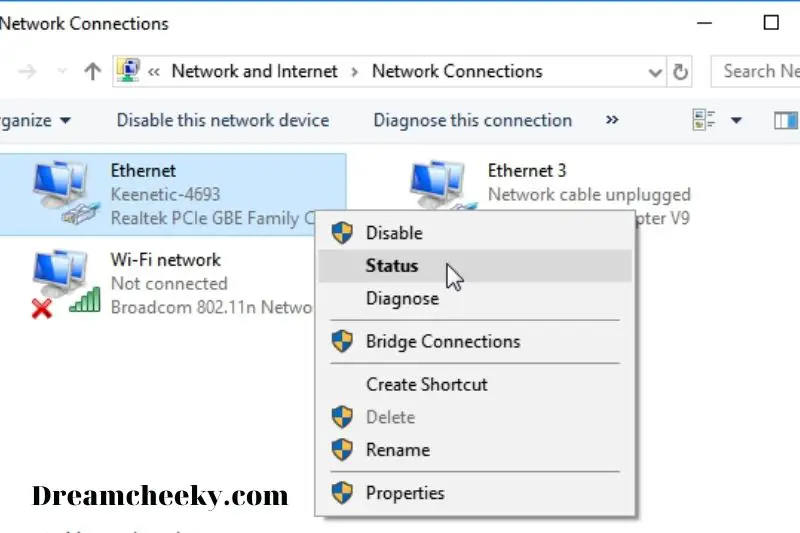
The most typical cause of a windows update issue is a faulty network connection. So, first, let’s look at it and see what we can do with the two options:
- Change your computer’s network connection.
- Disable the IPv6 network.
1. Change your computer’s network connection.
Switching between Wi-Fi and ethernet connections may be the key to resolving the Windows update problem. Before you do that, switch off your computer’s Wi-Fi and then turn it back on. If that doesn’t work, try something else.
If you’re connected to the internet by Wi-Fi, try reconnecting with an ethernet cable. If you’re using an ethernet cable, try utilizing Wi-Fi to connect your computer.
Attempt to update Windows 10 after switching networks. Hopefully, the problem had been resolved.
2. Uncheck the IPv6 Network option.
IPv4 and IPv6 are the two types of IP addresses available to any system. These addresses, like your home address, are used to identify your machine on the network.
The IPv6 address can occasionally cause problems and prevent Windows from connecting to the Windows update server. The problem can be fixed by unchecking the IPv6 network.
Step 1: Click the Internet symbol in the bottom right corner of your screen with your right mouse button.
Step 2: Select the option to Open Network & Internet Settings.
Step 3: In the Status panel, select Network and Sharing Center.
Step 4: On the left side of the Network and Sharing Center box, select Change adapter settings.
Step 5: Right-click the sort of connection you’re using right now, such as Wi-Fi, LAN, or Ethernet. Select Properties.
Step 6: In the Properties window, scroll down to Internet Protocol Version 6 (TCP/IPv6) and uncheck the box.
Step 7: Press the OK button.
Step 8: Shut down and restart your computer. Check for Windows updates after the system has restarted.
Update drivers
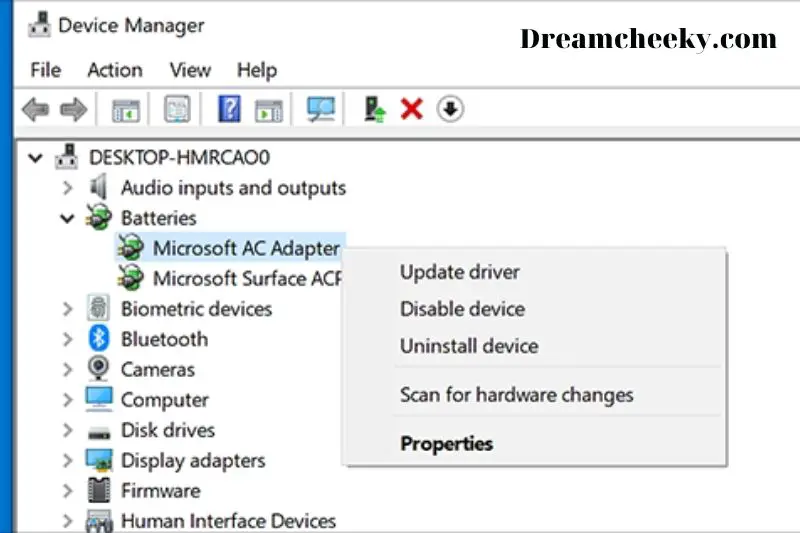
If the drivers installed on your computer are incompatible or troublesome, the Windows update error 0x8024401c can occur.
If drivers for peripheral devices like as printers, ethernet cards, and other devices are faulty, they can hinder Windows updates.
1. Manual Update
Install generic drivers from the original driver manufacturer’s website wherever possible. Here’s how to go about it:
Step 1: Press the Windows + X keys at the same time.
Step 2: Select Device Manager from the drop-down menu.
Step 3: Right-click on the driver that isn’t operating properly and select Properties.
Step 4: Remove the driver.
Step 5: Go to the driver manufacturer’s website and search for your operating system and CPU to obtain the driver.
Step 6: Restart your computer after installing the driver. Keep an eye out for new information.
2. Automatic Update
It’s a time-consuming process to manually download each driver after verifying its compatibility. Furthermore, if you install the incorrect one, there is a high risk of failure.
Third-party software such as DriverFix and Driver Easy can automatically install and update appropriate drivers on your PC, saving you time and effort.
You won’t have to keep checking for updates on each driver because this software will do it for you.
DriverFix
Step 1: Download and install DriverFix from the DriverFix website.
Step 2: Launch the software and wait for it to scan your computer for system requirements and outdated drivers.
Step 3: Once the system has been scanned, you will be presented with a list of faulty drivers.
Step 4: Select the drivers you want to update. The update will be handled by the program.
Step 5: Shut down and restart your computer. Check to see if Windows 10 can be updated.
Driver Easy

Step 1: Download and install the software from the Driver Easy website.
Step 2: Launch the Driver Easy application and select Scan Now to begin scanning your PC for any driver issues.
Step 3: A list of drivers that need to be updated will appear. To update each driver individually, click the Update button next to it. You may also update all of the drivers at once by clicking the Update All option.
Step 4: Once the process is complete, restart your computer to see if the Windows update problem 0x8024401c has been resolved.
Modify the setting in Registry Editor
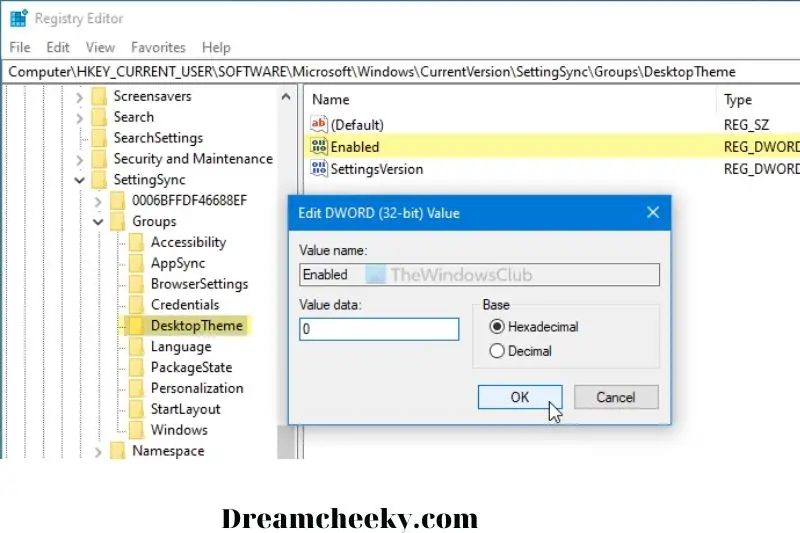
The Windows update error 0x8024401c can also be caused by missing or corrupt system files. Using the Registry Editor, you can edit these files under the HKEY LOCAL MACHINE -> Software -> Policies -> Microsoft -> Windows -> WindowsUpdate -> AU folder.
Step 1: To launch the Run dialog box, press the Windows and R keys together.
Step 2: Type regedit in the box next to the Open: label and hit enter.
Step 3: Take the following route: HKEY_LOCAL_MACHINE -> Software -> Policies -> Microsoft -> Windows -> WindowsUpdate -> AU
Step 4: On the right side of the window, look for UseWUServer.
Step 5: Right-click the file and change the registry value data on the far right to 0 with the right-click menu (zero).
Step 6: To save the changes, click OK.
Step 7: Restart the machine and see if the Windows Update function has been restored.
Repair system files
It’s possible that the 0x8024401c problem has something to do with system files. A Blue screen of death can occur when system files are damaged or corrupted.
There are two options for resolving the problem. Here’s how to do it:
Option 1: Automatically (Recommended)
To find the reason of Windows frequent difficulties, utilize a repair program to check various sections of your computer. It will take care of system faults and essential system files, as well as finding the best solution for you.
Option 2 – Manually
System File Checker is a built-in tool that scans for corrupt or damaged system files and, if necessary, restores them. This program, however, can only diagnose main system files and will not help with broken DLLs, Windows Registry keys, or other issues.
Option 1 – Make it happen automatically (Recommended)
Reimage (also known as Reimage Repair) is a computer repair program that can quickly analyze and resolve problems with your computer.
It is customized for your system and operates in a secure and automated manner. It will initially look for problems linked to hardware, then security concerns (powered by Avira Antivirus), and finally programs that crash and missing system files. It will find a solution to your specific problem once it is finished.
- Get Reimage and install it.
- Run a free scan with Reimage. This could take a few moments.
- On your PC, you’ll see a summary of the faults that have been found. When you click START REPAIR, all of the problems will be resolved instantly. (The full version must be purchased.) It comes with a 60-day Money-Back Guarantee, so if Reimage doesn’t fix your problem, you may get a refund at any time.
Option 2 – Manually
SFC (System File Checker) is a Windows application that checks and repairs corrupted or incomplete system files automatically. You may perform an SFC scan on your system and have it automatically fixed if there are any issues.
- In the search box, type cmd.
- Select Run as administrator from the context menu when you right-click Command Prompt.
- In the command prompt, type sfc /scannow and hit Enter.
- This process may take some time, and after scanning, it will attempt to automatically resolve the errors. As a result, don’t close the window until the verification is complete. Restart your computer after it’s finished and attempt updating Windows again.
Perform a clean boot
In your system, you can perform a clean boot. Follow these steps:
- On your keyboard, simultaneously press the Windows logo key and R.
- In the Run box, type msconfig and press OK.
- Go to the Services tab and select Hide all Microsoft services from the drop-down menu.
- Select Disable all and then OK.
- Restart your system and check for updates.
Fix Error 0X80242FFF
Why does 0x80242fff appear on Windows 11?
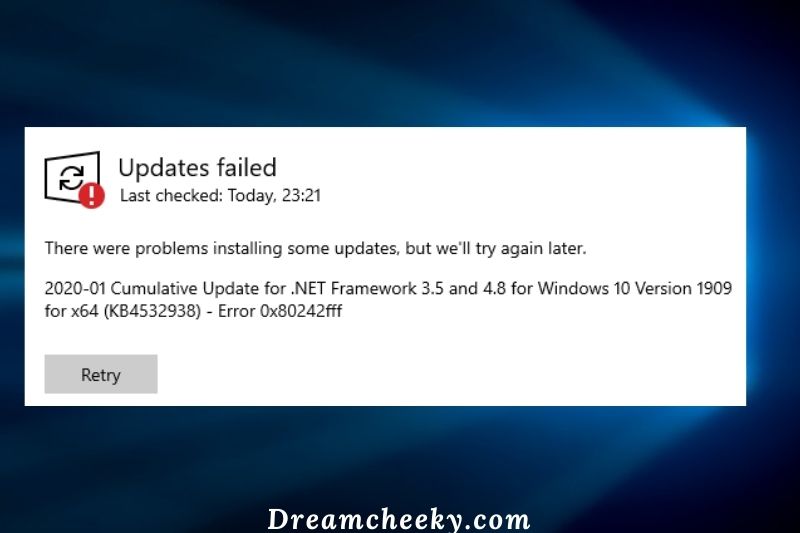
The computer system is responsible for most of the errors 0x80242fff. This includes corrupt files in your file system, inactive Background Intelligent Transfer Service and failed updates. It also incorrectly installed updates or network settings.
Fix Windows 10 & 11 Updates failed Error 0X80242FFF
If you’re getting the 0X80242FFF error when trying to update Windows 10 or 11, there are a few things you can try to fix the problem:
- Run Windows Update troubleshooter
- Reset Windows update components
- Repair .NET Framework
- Install the Update manually
- Check WUAHandler.log
- Restart Windows Update Service
- Run SFC/DISM Scans
- Use a dedicated repair tool
- Perform an in-place upgrade
Note: some errors have a familiar fix, so we do not mention again
Repair .NET Framework
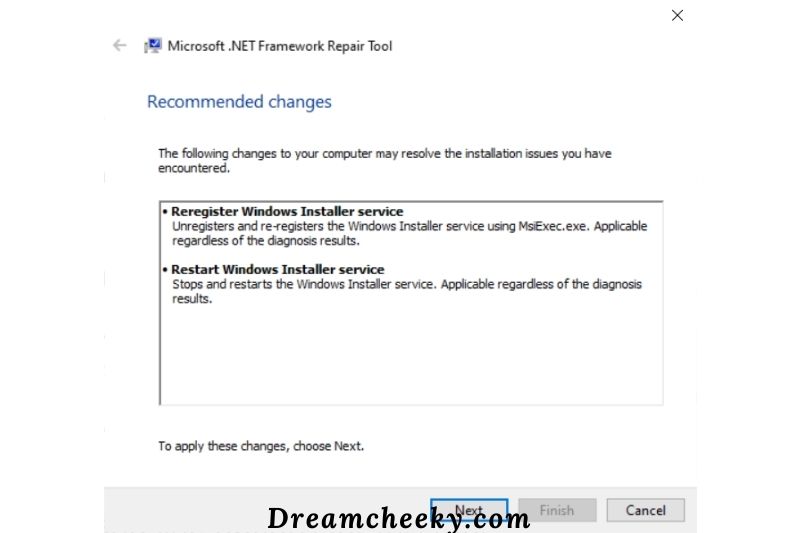
If this error occurs for .NET Framework then repair it and then run Windows Update.
Install the Update manually
If none of the solutions above were of any assistance, you can search the Microsoft Update Catalog website for the KB number and download it. Then, manually install the update that caused the error.
- Navigate to the Microsoft Update catalog using your browser.
- Type the problem update in the search bar at the top right.
- Next, find the correct update and download it.
- Next, you will need to go to File Explorer and locate the driver that you downloaded, then right-click on it and click Install.
Check WUAHandler.log

You can check the WUAHandler.log if none of these solutions worked. You will get it here – C:\Windows\CCM\Logs\WUAHandler.log.
WUAHandler.log tracks when Windows Update Agent searches for software updates on client computers. This is an Update Handler error. You may be able to troubleshoot it further by looking at WindowsUpdate.log.
Use a dedicated repair tool
It is likely that system errors will occur at some time, and there may be several perpetrators.
There are many things that could cause system problems, including missing or corrupt system files, outdated DLLs or other damaged DLLs, conflicts, and incompatibilities.
Let’s say you have issues with Windows Update and Microsoft Store. Even if your internet is reliable, you get the error code “Install 0x80242ffff”. Nothing beats running a scan with Restoro to identify and fix any issues that may arise.
Expert Tip: Sometimes it is difficult to fix problems on your computer, particularly when you have corrupt repositories and missing files. Your system might be partially damaged if you have difficulty fixing an error. Restoro is a tool that scans your computer and identifies the problem.
Install the Windows Updates from the Microsoft catalog
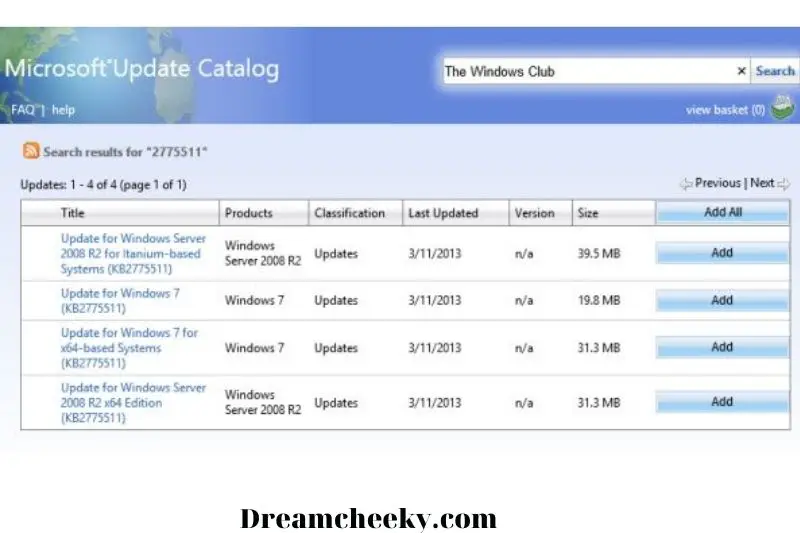
- To open the Settings app, press the Windows key + I
- Navigate to the Windows Update option.
- Click the Check for updates button. Notify the KB that the updates are pending.
- Visit the Microsoft catalog page.
- Enter the KB number and hit Enter.
- To fix the error, click on the Download button.
Perform an in-place upgrade
- Visit the Windows 11 download page.
- Click Download Now in the Create Windows 11 Installation Media Section.
- After the tool has been downloaded, you can run it.
- To proceed, click Accept.
- Click Next and select Upgrade this PC Now.
- To complete the process, follow the steps on the screen.
The upgrade can take up to an hour. Be patient and don’t interrupt the process. After the upgrade is complete, Windows 11 will be installed.
Fix Error 0x80072ee2 Windows 10
What Causes the 0x80072EE2 Update Error?
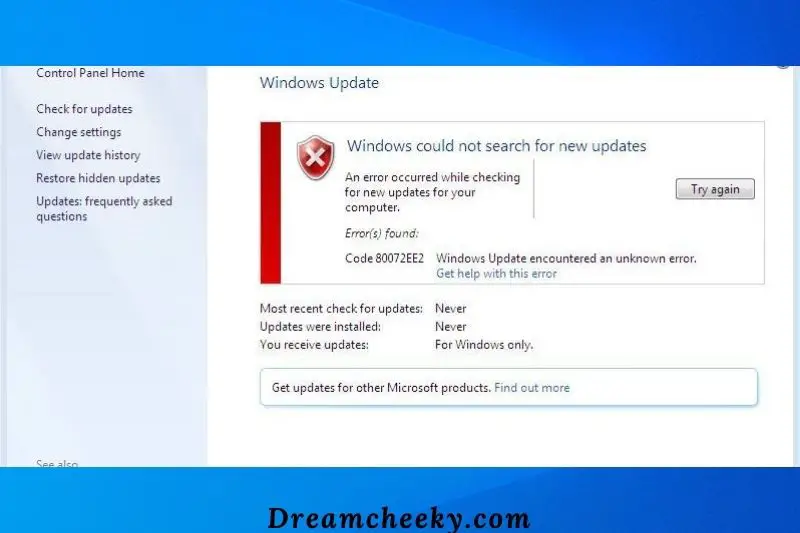
When their operating system is unable to connect to the update server, people often encounter the 80072EE2 error. In other words, Windows 8.1 and Windows 10 cannot receive a response from the update server for a specified time.
This error can be caused by a poor or intermittent internet connection. Other times, the Firewall could be blocking access to the server. The communication between them is then disrupted.
Do not panic if you are experiencing the same issue. We will show you how to fix error code 0280072ee2 on Windows 10 and other operating systems. Continue reading to learn how to resolve this problem and reap the benefits of OS updates.
How can I fix update error 0x80072EE2 in Windows 10?
If you’re getting the 0x80072EE2 error when trying to update Windows 10, it might be because of a corrupted file or an incorrect network setting. To fix this issue, you can try:
- Check your Internet connection
- Use a non-intrusive antivirus
- Run the Windows Update Troubleshooter
- Reset the Windows 10 Update components
- Run SFC scan
- Disabling the Firewall
- Resetting the Components of the Update
- Restart BITS Service
- Try to update in Clean Boot State
Whitelist the Windows Update servers
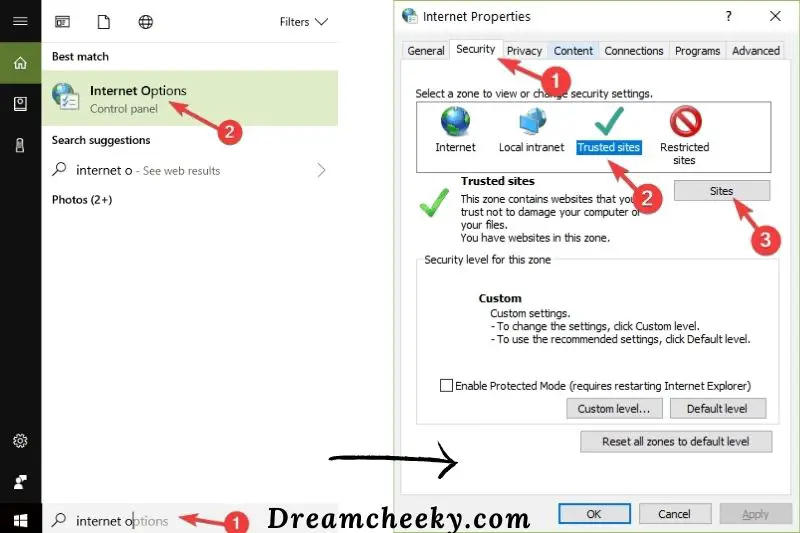
- Click on Start > Type internet options > Open Internet Options.
- Click on the Security tab in the upper menu.
- Choose the Trusted Sites option from the Security window.
- Click on the Sites.
- For all sites within this zone, uncheck the Require Server Verification (https) box.
- There will be a box that says “Add this website to the area.” Type in the following addresses: http://update.microsoft.com and http://windowsupdate.microsoft.com.
- After you have entered the addresses, click on the Add button.
- To save your settings, click on the OK button.
- Check to see if the error message persists after following the steps.
- If the error 0x80072EE2 doesn’t appear, please leave the addresses in the trusted websites list.
Expert Tip: Sometimes it is difficult to fix problems on your computer, particularly when you have corrupted files or repositories. Your system might be partially damaged if you have difficulty fixing an error. Restoro is a tool that scans your computer and identifies the problem.
If none of the above solutions work and you still get this error message, you can add the updated server addresses to your trusted website list to determine if that is the problem.
Resetting the Components of the Update

Corrupted Windows Update files may cause the 0x80072ee2 error in some cases. This error can be fixed by using the Command Prompt to reset the components. These are the steps:
- Click on the Search icon.
- Type “cmd” (no quotes).
- Right-click Command Prompt, and choose Run as Administrator.
- Disable certain Windows Update components. These commands will help you do it. After each command, hit Enter.
net stop wuauserv
net stop cryptSvc
net stop bits
net stop msiserver
- Next, rename the SoftwareDistribution directory. The following commands are required:
ren C:\Windows\SoftwareDistribution SoftwareDistribution.old
ren C:\Windows\System32\catroot2 Catroot2.old
- Now you will need to restart any components that were previously disabled. The following commands are required:
net start wuauserv
net start cryptSvc
net Start Bits
net start msiserver
- Restart your computer to confirm that the error is gone.
Restart BITS Service
BITS or Background Intelligent Transfer Service is an integral part of Windows Update. It manages background Windows Update downloads and scans for new updates. You may need to restart the BITS Service if Windows Update fails repeatedly. To do this, you will need administrator privileges.
Start Windows Services Console by entering services.msc into the Run prompt, and then hit the Enter key.
Search for Background Intelligent Transfer Service. Double-click to open Properties. The default Startup type for this is Manual.
Use the provided buttons to stop and then start this service.
Is this helpful?
Set the Startup type to Automatic (Delayed), and then click on Apply. Next, click on the Stop button to terminate the Service. Click on the Start button to start it again.
Fix Error 0x80248007
How to Fix Windows Update Error 0x80248007
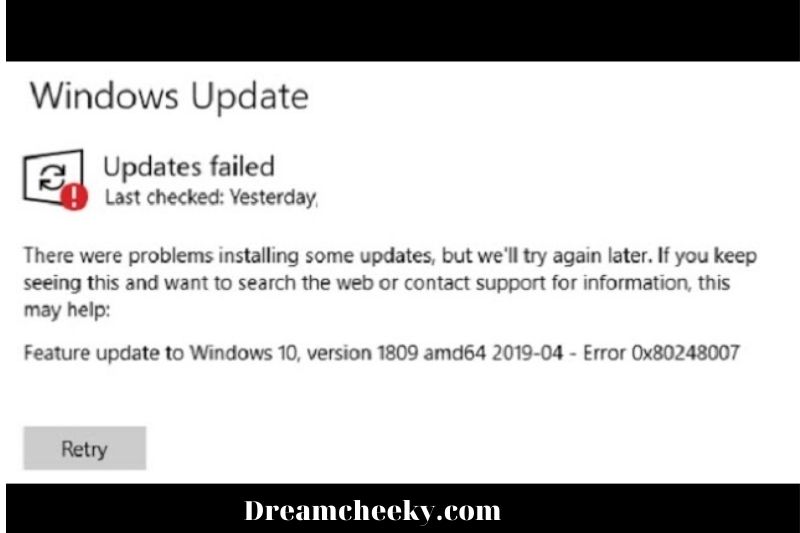
If you’re getting the 0x80248007 error when you try to update Windows, it might be caused by a problem with the Windows Update service. To fix the problem, you can try:
- Use an Elevated Command Prompt
- Restart the Windows Update service
- Clean the SoftwareDistribution folder
- Update manually from Microsoft’s website
- Run Windows Update Troubleshooter
- Run SFC and DISM
- Install Windows Update in Clean Boot State
- Delete Windows Update Cache Files
Note: some errors have a familiar fix, so we do not mention them again
Fix Error 0x800f0900
How to Fix Windows Update Error 0x800f0900 on Windows 10
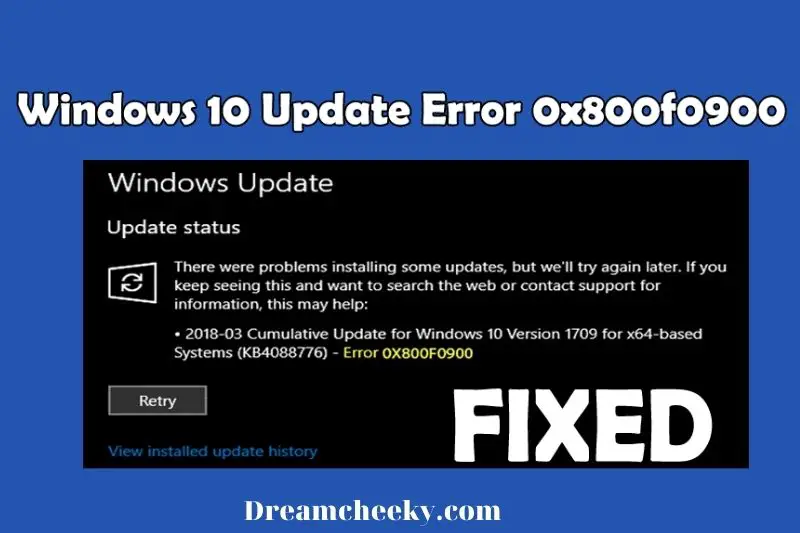
If you’re seeing the 0x800f0900 error when you try to update Windows 10, it’s because the Windows Update service is having trouble connecting to Microsoft’s servers. There are a few things you can do to fix this problem:
- Install the Update Manually
- Use Windows 10 Update Assistant
- Run the Windows Update Troubleshooter
- Run the System File Checker (SFC) Scan
- Run the Deployment Image & Servicing Management (DISM) Scan
- Restart Windows Update Services
- Make sure you can upgrade to 1803 in the first place
- Uninstall the antivirus
- Clean temporary files
- Remove peripheral devices
- Use Media Creation Tool
- Perform a clean reinstall
- Reset SoftwareDistribution & Catroot2 folders
- System Restore
- Remove unnecessary files via Disk cleanup
- Fix socket errors with Winsock reset
Make sure you can upgrade to 1803 in the first place
Our knowledge shows that the system requirements for Windows 1803 (a.k.a. the April Update) are the same as for Windows 10. These are the requirements you will need to meet to run Windows 10 (1803).
- RAM: 1GB 32-bit and 2GB 64-bit
- Hard disk space: 16 GB 32-bit and 20 GB 64-bit
- CPU: 1GHz and faster
- Screen Resolution: 800×600
- Graphics: Microsoft DirectX 9 and later, with WDDM 1.0 driver
- Internet access
There are however some new features in certain devices. We have already reported that there is a problem with Intel-produced SSDs. Microsoft has apparently stopped supporting Conexant MEDIA Sound Drivers. The Conexant Legacy sound drivers can’t be upgraded.
Also, ensure that your internet connection is stable throughout the entire update process. This is crucial as it is known to be a cause of update errors.
Clean temporary files
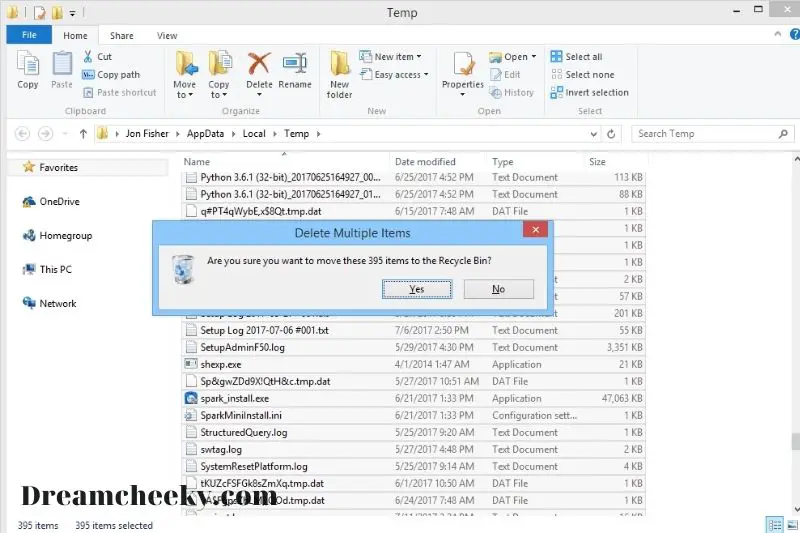
The Recovery menu has a rollback option that you may have seen or used. Windows 10 stores the installation of the previous version. This allows you to roll back the system if things go wrong. This is a great idea on paper. Some users suggest that you clean these temporary files to fix the 0x800f0900 error.
Here are the steps to run Disk Cleanup to remove all duplicate files.
- File Explorer or Open This PC
- Right-click the partition to be rid of duplicate data.
- Click on Disk Cleanup.
- Click on the Clean Up System Files option.
- Click OK to confirm.
Remove peripheral devices
Peripheral devices, or more importantly their drivers, can cause a lot of issues with updating. Although the problem with legacy drivers and Windows 10 is well-known, it is still difficult to fix as there are no functional drivers and generic drivers. We recommend that you uninstall all peripheral devices and remove them during the upgrade process.
Driver Booster can help you deal with your out-of-date drivers.
Once the major update has been successfully installed, you will be able to reconnect the device or devices and check for updates. If you are able to locate the legacy driver that works, don’t forget about disabling the driver updates and installing it manually.
Perform a clean reinstall
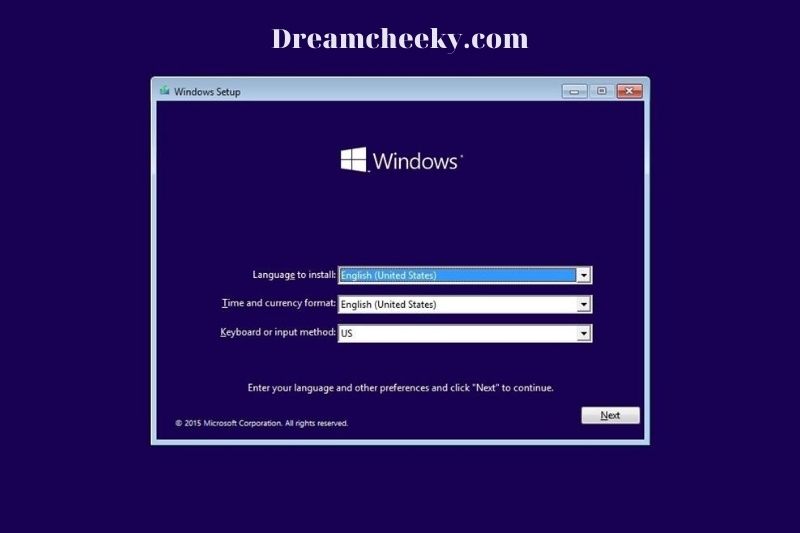
If none of these steps worked, a clean reinstallation is the only option. This guide will show you how to reinstall your OS step by step.
This won’t take much time, and you can still keep your data. You will need to backup files from the system partition onto a secondary partition or an external drive. You should have enough data on the bootable thumb drive that you created using Media Creation Tool in the previous step.
Reset SoftwareDistribution & Catroot2 folders
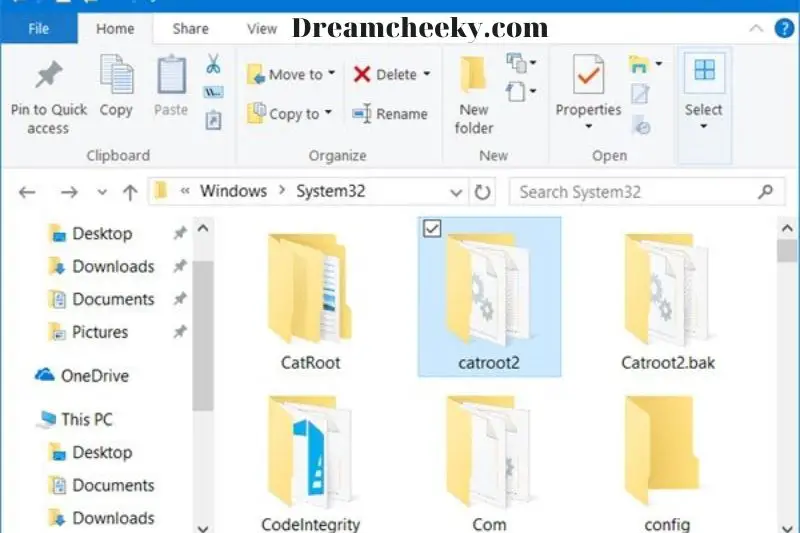
The contents of the SoftwareDistribution folder must be deleted. All the update files are downloaded inside the Software Distribution folder which is located at C:\Windows\SoftwareDistribution. After stopping Windows Update Services, first, delete all files from it. To see if the process starts automatically, restart the computer several times.
Reset the Catroot2 folder, which contains the signatures for the Windows Update package. This will help in the installation.
System Restore
System Restore can be used to restore Windows to its original state. Then, you can start the download again. It’s a good idea if you are accustomed to creating restore points frequently.
Remove unnecessary files via Disk cleanup
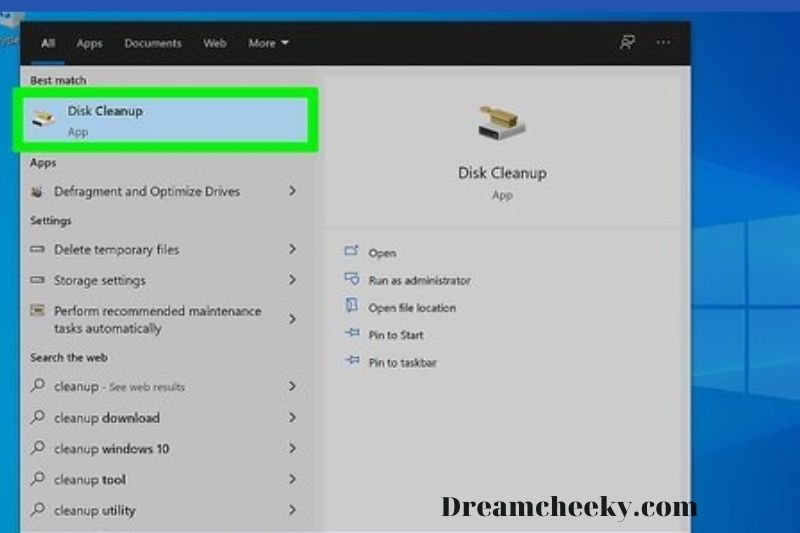
If none of the above solutions work, you can delete the temp file with the Disk Cleanup Tool. Follow these steps to fix the error 0x800f0900 on your computer.
- To launch File Explorer, hold the Win and E keys together.
- Next, click on This PC in the left pane.
- Right-click the main partition (C:\) and choose Properties.
- Click on the Disk Cleanup button, see the screenshot below.
- Next, click on the “clean up your system files” button.
- After you have completed the process, click on all boxes except Download to confirm and then press OK.
- This tool will search for unnecessary files. When it prompts you, click OK.
- After deleting non-essential files, restart your computer. This will ensure that you delete all leftovers even after you have completed the above task.
Fix socket errors with Winsock reset
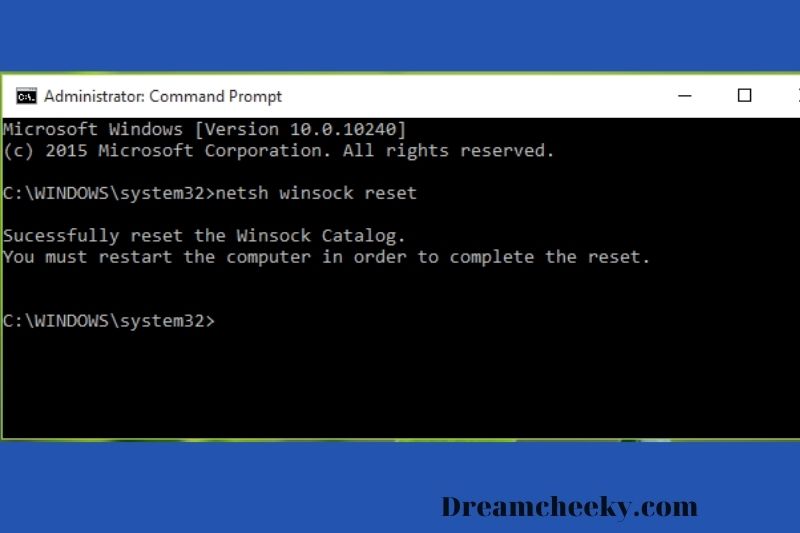
Winsock provides all information about your internet connectivity. You might be unable to download certain data packets over the internet if some of these settings are corrupted. This could cause the update process to fail. This can be solved by resetting the settings.
- Open Command Prompt to be an administrator again
- Type the following command, and hit Enter.
- netsh winsock reset
- Reboot your system.
Fix Error 0x80070424 on Windows 10
What causes the Windows Update Error 0x80070424 on Windows 10?

The error is well-known and can be easily corrected. It could be due to:
Windows update services. Windows update requires that certain services are running for updates to be downloaded and installed safely. If the services required are not running, an error message will be displayed.
System files are required. This error can also occur if system files required for the update are not registered on the system.
These solutions will resolve your problem.
Fix: Windows Update Error 0x80070424

The 0x80070424 error is a common Windows 10 error that can occur when trying to update Windows or install new updates. There are a few different ways to fix this error, check below:
- Windows Update Troubleshooter
- Enabling Windows Update Service
- Using Windows Registry
- Reset Windows Update Components
- Repair Windows
- Check Your Connection
- Install the Update Manually
- Reset the Windows Update Services Using a Batch Script
Reset the Windows Update Services Using a Batch Script
Open a new Notepad file and paste the commands listed below to create the script. Then, click on Save As, and name it Windows.bat.
- net stop bits
- net stop wuauserv
- net stop appidsvc
- net stop cryptsvc
- Del “%ALLUSERSPROFILE%\Application Data\Microsoft\Network\Downloader\*.*”
- rmdir %systemroot%\SoftwareDistribution /S /Q
- rmdir %systemroot%\system32\catroot2 /S /Q
- sc.exe sdset bits D:(A;;CCLCSWRPWPDTLOCRRC;;;SY)(A;;CCDCLCSWRPWPDTLOCRSDRCWDWO;;;BA)(A;;CCLCSWLOCRRC;;;AU)(A;;CCLCSWRPWPDTLOCRRC;;;PU)
- sc.exe sdset wuauserv D:(A;;CCLCSWRPWPDTLOCRRC;;;SY)(A;;CCDCLCSWRPWPDTLOCRSDRCWDWO;;;BA)(A;;CCLCSWLOCRRC;;;AU)(A;;CCLCSWRPWPDTLOCRRC;;;PU)
- cd /d %windir%\system32
- regsvr32.exe /s atl.dll
- regsvr32.exe /s urlmon.dll
- regsvr32.exe /s mshtml.dll
- regsvr32.exe /s shdocvw.dll
- regsvr32.exe /s browseui.dll
- regsvr32.exe /s jscript.dll
- regsvr32.exe /s vbscript.dll
- regsvr32.exe /s scrrun.dll
- regsvr32.exe /s msxml.dll
- regsvr32.exe /s msxml3.dll
- regsvr32.exe /s msxml6.dll
- regsvr32.exe /s actxprxy.dll
- regsvr32.exe /s softpub.dll
- regsvr32.exe /s wintrust.dll
- regsvr32.exe /s dssenh.dll
- regsvr32.exe /s rsaenh.dll
- regsvr32.exe /s gpkcsp.dll
- regsvr32.exe /s sccbase.dll
- regsvr32.exe /s slbcsp.dll
- regsvr32.exe /s cryptdlg.dll
- regsvr32.exe /s oleaut32.dll
- regsvr32.exe /s ole32.dll
- regsvr32.exe /s shell32.dll
- regsvr32.exe /s initpki.dll
- regsvr32.exe /s wuapi.dll
- regsvr32.exe /s wuaueng.dll
- regsvr32.exe /s wuaueng1.dll
- regsvr32.exe /s wucltui.dll
- regsvr32.exe /s wups.dll
- regsvr32.exe /s wups2.dll
- regsvr32.exe /s wuweb.dll
- regsvr32.exe /s qmgr.dll
- regsvr32.exe /s qmgrprxy.dll
- regsvr32.exe /s wucltux.dll
- regsvr32.exe /s muweb.dll
- regsvr32.exe /s wuwebv.dll
- netsh winsock reset
- netsh winsock reset proxy
- net start bits
- net start wuauserv
- net start appidsvc
- net start cryptsvc
Right-click the Windows.bat file, and choose Run as administrator. Wait until the script runs on your computer. Then restart it and check for updates.
Windows 10 Update Error 0x800706be
What Causes Windows Updates To Fail On Computers?

It is usually caused by a service handling conflict (transmissions of the file between client/server is disabled). However, there are other causes that could cause Windows 10 Update Error Code 0x800706be.
Other causes of Windows Error Code 020706BE include apps conflict and blocked firewalls, damaged system files and incorrect system dates and times, incompatible hardware and outdated drivers.
When trying to boot the system, or execute specific apps, you may encounter the 0x800706BE error.
Also, the 0x800706BE error blocks newly added hardware devices so that the OS cannot communicate with them. Sometimes, USB ports can be disabled.
Fix: Windows 10 Update Error 0x800706be
Windows 10 Update Error 0x800706be is a very common error that occurs when trying to update Windows 10. There are a number of ways to fix this error:
- Reset Windows Update Components
- Uninstall Lately installed cumulative updates
- Attempt updating Windows again
- Run SFC/DISM
- Run Windows Update Troubleshooter
- Clean Install Windows 11/ Windows 10 21H2
- Scan the Registry
- Reset Windows Update Services and Clear Temporary Files
- Restore Windows to a Restore Point
Windows 10 Update Error 0x80244022?
What Causes Windows 10 Update Error 0x80244022?

Windows 10’s 0x80244022 error code is caused by a specific software update problem. This error is usually caused by a connection problem during an update operation. These are some possible causes:
Some DLL files and registries files may be corrupted or missing during the update process.
- Driver mismatch
- Incorrect installation or removal of an app
- Conflict with a critical base component
- Drivers for corrupt or out-of-date systems
- Service for damaged windows
- Website disabled
How to fix Windows 10/11 update error 0x80244022
If you’re getting the 0x80244022 error when trying to update Windows 10 or 11, there are a few things you can try to fix the issue
- Use System File Checker and DISM.
- Run Microsoft’s Online Windows Update Troubleshooter.
- Disable your Antivirus or Firewall.
- Disable Proxy or VPN.
- Reset Windows Update components.
- Verify the date and the time
- Install the updates manually
- Run a Clean Bootup
- Registry Hotfix for Windows Update Error
Windows Update Error Code 0x80072efe
What Causes Windows Update Error Code 0x80072efe?
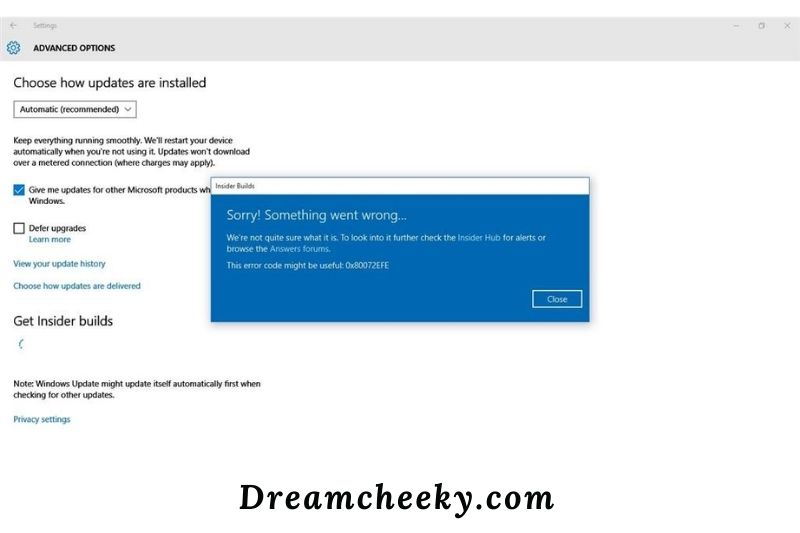
Your device must establish an authenticated connection to Microsoft servers in order to install a new version. If the requirements are not met, your device will be unable to install or upgrade to the new version.
Most often, error code 0x80072efe occurs when the date and/or time settings on your computer are incorrect. This is the simplest and most effective way to resolve this problem.
You can adjust the date and hour settings of your system to fix the update error 0x80072efe. Other options include checking your Internet connection, disabling VPN or Firewall, and resetting network settings.
How to fix x80072efe error windows 10
If you’re seeing the x80072efe error when trying to update Windows 10, it’s likely because of a problem with the Windows Update service. There are a few different ways that you can fix this issue, which we’ll outline below:
- Set Correct Date & Time on your PC
- Temporarily Disable Antivirus and Firewall
- Uncheck Proxy Option
- Run CCleaner and Malwarebytes
- Check Internet Connection
- Disable VPN
- Use Network Troubleshooter
Set the Correct Date & Time on your PC
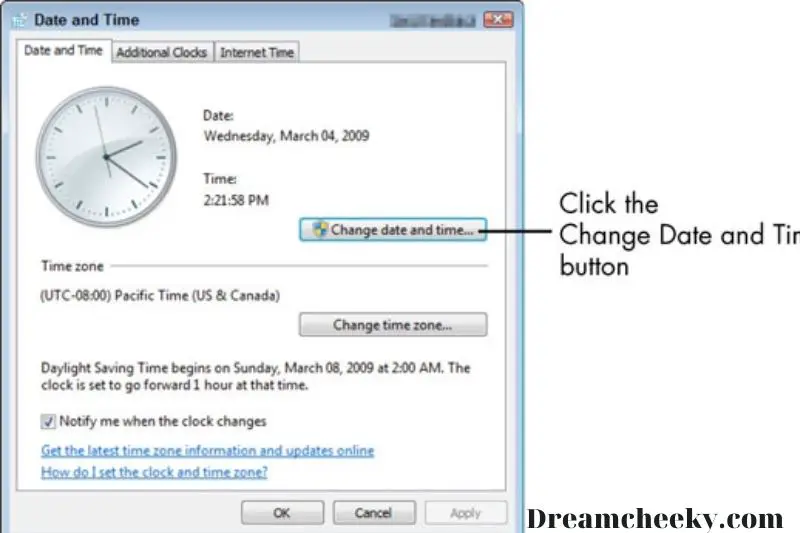
- Click on the date/time icon on the taskbar, then click on “Date and Time Settings“.
- Windows 10: Set the “Set Time Automatically” option to “on”.
- Click on “Internet Time” to open the menu and tick “Automatically sync with an Internet server“.
- Click on Server “time.windows.com”, then click “Update” and “OK”. The update is not necessary. Click OK.
- Set the correct date and time to fix Windows Update Error Code (0x80072efe). If this does not resolve the problem, please continue.
Run CCleaner and Malwarebytes
- Download and Install CCleaner & Malwarebytes.
- Malwarebytes will scan your computer for potentially harmful files. It will remove any malware found.
- Run CCleaner now and choose Custom Clean.
- Select the Windows tab, checkmark defaults, and then click Analyze.
- After Analyze is finished, ensure that you delete all files.
- Click on the Run Cleaner button to let CCleaner do its job.
- You can further clean your system by selecting the Registry tab and ensuring that the following items are checked:
- Click on the button to scan issues. After scanning is complete, click on Fix selected Issues.
- Answer Yes to the question “Do you want backup changes to the registry?”
- After your backup is complete, click the Fix All Selected Problems button.
- To save changes, restart your computer.
Update Error Code 0x8007000d
Causes of Update Error Code 0x8007000d
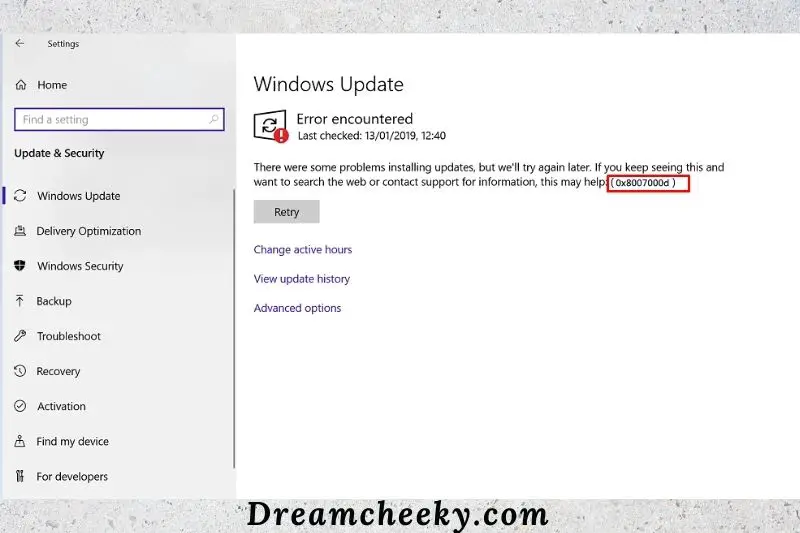
This error is caused by the following:
- Downloading updates from the network
- Viruses or malware
- Unexpected crash during update
- Files accidentally deleted
- Apps that are not working
This error is important for a smooth functioning computer.
How to Fix Update Error Code 0x8007000d
If you see the error code 0x8007000d when you try to update your Windows 10 device, it means that the installation has failed. There are a few things you can do to fix this problem:
- Use the Compatibility Troubleshooter
- Manually reset the Windows Update components
- Run the Windows Update Troubleshooter
- Run DISM
- Run SFC
- Use the Windows 10 Update Assistant
- Disable Background Programs
- Uninstall Mixed Reality
- Configure Group Policy Setting
- Edit Registry
Windows Update Error 0x80070643
What Causes Windows Update Error 0x80070643?

The error message 0x80070643 is often caused by system settings that are incorrectly configured, malware or virus infection, driver malfunction, corrupted system files or older versions of programs that weren’t properly removed when a newer version was downloaded.
An error 0x80070643 can also be caused by a Windows tablet or computer is shut down improperly or disconnected from a source of power.
You should run your antivirus software if you suspect that you may have malware on your computer.
How to Fix Windows Update Error 0x80070643
If you’re seeing the 0x80070643 error when you try to update Windows, it might be caused by a corrupted file or a defective system component. There are a few different ways to fix this error, so we’ll walk you through them all:
- Download .NET Framework
- Scan for Malware
- Perform an SFC Scan
- Reboot Windows Installer
- Rename the SoftwareDistribution folder
- Run Windows Update Troubleshooter
- Install Windows Updates in Clean Boot State
- Retry the Windows Updates or the Program Installation
- Re-download the Update or Installation Files
- Reinstall the Program
- Check Your Internet Connection
- Close All other Programs that Are Currently Running
- Pause other Downloads and Updates on Your PC
- Restart Your Computer
- Temporarily Disable Your Antivirus Software
- Manually Install the Windows Updates
Windows 10 update error code 0x800f0831
What causes Update Error 0x800f0831
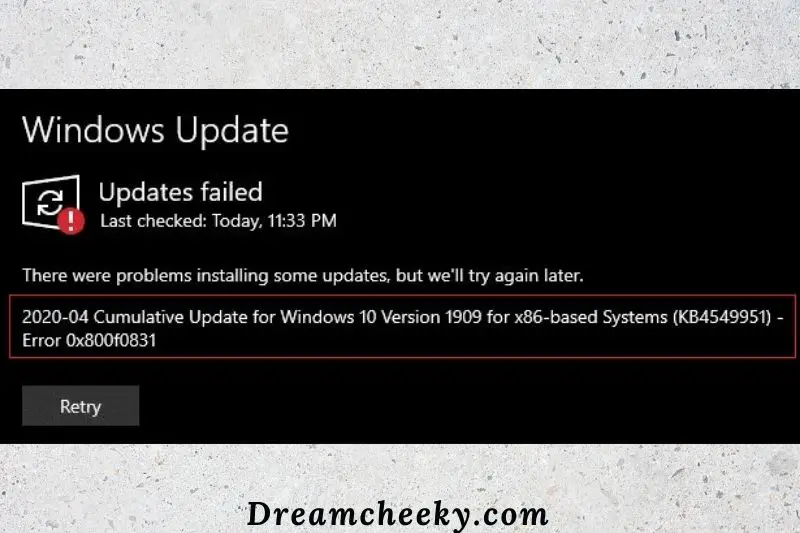
Windows 10 error 0x800f0831 is caused by a corrupt system or outdated files. This bug can also be caused by incorrectly configured proxy settings, running unnecessary services, or anti-malware software. This issue can be fixed by scanning and repairing corrupt files with either the DISM utility or the troubleshooter.
You can also reset Windows Update components to fix missing files. If none of these solutions work, you can perform a clean reboot on your system. These are just a few of the many options available.
How to fix Windows 10 update error code 0x800f0831?

If you’re seeing the 0x800f0831 error when trying to update Windows 10, it’s likely because of a problem with the Windows Update components on your PC. There are a few different ways to fix this issue, so be sure to try each of the methods below until you find one that works for you:
- Download the missing KB package
- Run Windows Update troubleshooter
- Perform SFC and DISM scans
- Reset Windows Update Components
- Disable Proxy
- Check Your Connection
- Restart the Update Services
- Manually Install the Updates
- Try Windows 10 Clean Boot
- Temporary Disable Antivirus
- Use a PC repairing software
- Enable .Net Framework 3.5
- Perform an in-place upgrade to repair Windows 11
Download the missing KB package
Most cases of the 0x800f0831 error are caused by the missing KB package. This does not allow for a newer version to be installed. You should therefore check the missing package and manually download it via Microsoft Update Catalog.
- To open File Explorer, press Win + E.
- Navigate to the following location: C:\\Windows\\Logs\\CBS.
- Double-click the CBS.log file to open it.

- Look for lines that contain the 0x800f0831 error or include the following information. (Ctrl + F is an option to search for specific keywords).

- Store corruption, manifest missing package: [Missing_Package]
Note the KB number on one of these lines.
- Go to Microsoft Update Catalog and download the missing package.
- Reboot your computer and then run Windows updates as usual.
Update Error 0xc1900101-0x30018 in Windows 10
What Causes Error 0xc1900101-0x30018 on Windows?
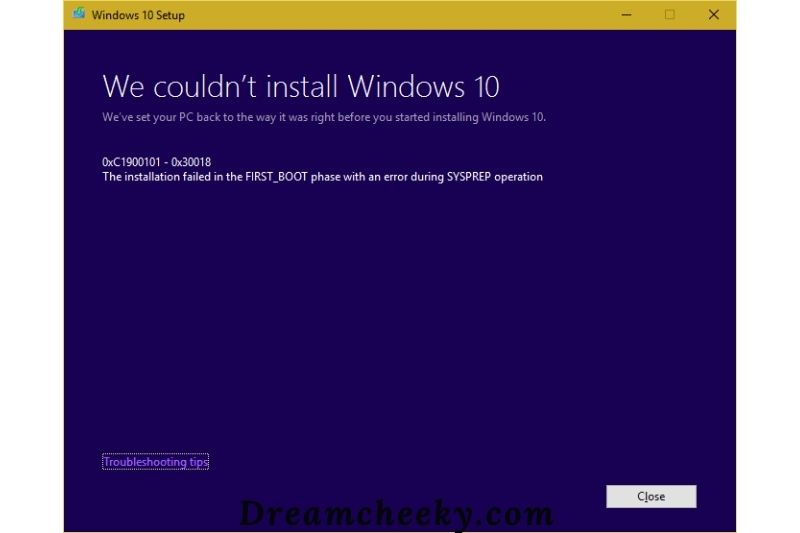
Our experts compiled a list of solutions and we determined that these are the main reasons this error message was triggered.
Antivirus: It’s possible that your Antivirus is blocking Windows from downloading all its files from its server. This could be causing the 0xc1900101-0x30018 error when you try to install the update package.
- Files that are damaged: Files may have been damaged by a power outage or corruption. We strongly recommend that you repair any damaged files first to determine if it fixes the error.
- A damaged storage device: You might encounter the 0xc1900101-0x30018 error when trying to install Windows. This can be avoided by running the SFC scan, as described below.
- Problematic drivers: Sometimes, you might not be able to update Windows properly due to conflicts with new updates. We recommend that you use the below solution to check if any drivers are problematic.
- Old Bios: It is possible that your bios are not compatible with all onboard components if they have become outdated. We recommend that you update your Bios to fix the error 0xc1900101-0x30018. Before you do this, ensure that you are familiar with the procedure. Any interruptions during installation or misconfiguration could result in a bricked board.
- On-Board sound: This error can occur if the On-board Sound feature has been enabled on your motherboard. We recommend that you turn off this feature and then verify that it fixes the 0xc1900101-0x30018 error.
We can now move forward to implementing the solutions after we have covered almost all of the reasons for its occurrence.
How to Fix Update Error 0xc1900101-0x30018 in Windows 10
If you’re seeing the 0xc1900101-0x30018 error when trying to update Windows 10, it’s likely because of a driver issue. Here are some methods you can use to fix the problem.
- Disable/Uninstall your antivirus
- Disconnect all peripherals/secondary devices
- Run SFC/DISM command-line programs
- Perform Disk Cleanup
- Reset Windows Update Components
- Use the Media Creation Tool
- Update or Remove problematic drivers
- Upgrade your BIOS
- Use Windows Troubleshooter.
- Try This Simple Registry Hotfix.
- Make Sure Your Computer Is Ready For the Update
- Disable the Onboard Sound in BIOS Settings
- Disable Wi-Fi in BIOS
- Modify or Create a Registry Key
Fix Error Code 0x8024402c
Major Reasons of 0X8024402C Error
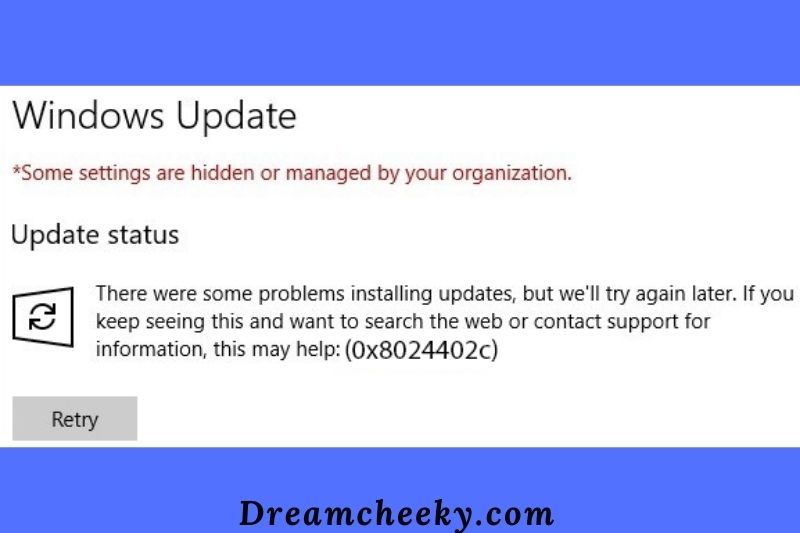
Many factors can prevent the computer from accessing the internet. We have listed a few of these:
- In progress updates
- You are setting the wrong time in your computer
- Files that are corrupt
- Junk files containing active threats
Bad firewall settings can prevent important updates from being delivered to your computer
Below are some solutions to this problem.
How to fix Windows Update Error Code 0x8024402c
If you see the Windows Update Error Code 0x8024402c, it means that there is a problem with the Windows Update service. To fix this problem, you can try the following methods:
- Fix the Proxy Settings
- Set up Automatically Detect the connection settings
- Change DNS servers to fix 0x8024402c error
- Temporarily disable Windows Defender Firewall
- Remove junk files
- Make use of Windows Updates Troubleshooter
- Configure Updates Client to fix 0x8024402c error
- Access geo-restricted video content with a VPN
- Reset Windows Update Components
Configure Updates Client to fix 0x8024402c error
If none of these methods have worked, try these steps:
Open Registry Editor by entering regedit to a Run dialog box (type run in Windows search bar, and select it from the list of results).
In the prompt for User Account Control, click OK and then yes.
When in Registry, go to HKEY_LOCAL_MACHINE > SOFTWARE > Policies > Microsoft > Windows > WindowsUpdate > AU;
Double-click UseWUServe (located on the right side of the AU key). Enter 0 in the Value data box and click OK
Close Registry Editor, and then try to install updates.
Remove junk files
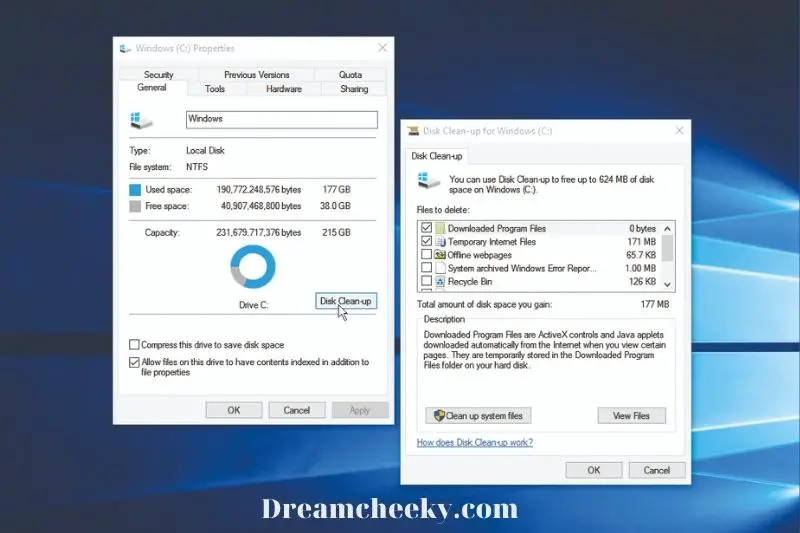
Windows might not be able to find and install updates due to junk files. Clear junk files and then try installing updates.
- Type cmd in the search box, and then select Run as administrator to return search results
- Press Enter.
- Type Enter cleanmgr and then click on Enter.
- Wait for the tool to scan your system. Click OK to delete junk files after it has finished scanning the system.
0x80070570 Error
Cause of Error Code 0x80070570
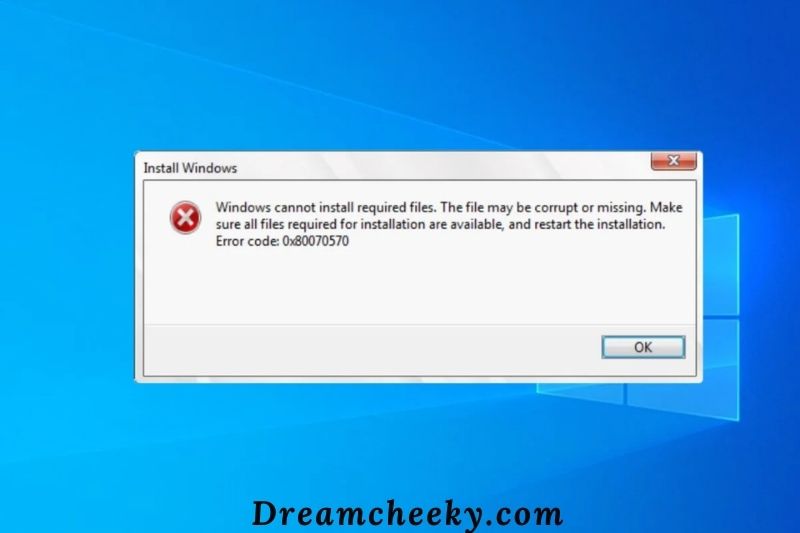
A missing or corrupted file is often what causes the 0x80070570 error message to appear. An error code 0x80070570 can also be caused by a corrupted or damaged drive. This can cause your Windows computer to not correctly read the files.
The error message that appears when Windows OS installs or upgrades is usually caused by a corrupted file. This could be due to problems on the server-side or your internet connection.
How to Fix 0x80070570 Error

- Use a dedicated tool
- Perform a Startup Repair
- Disable your antivirus
- Check your hard drive for errors
- Perform in-place upgrade
- Delete $ directories
- Delete all files from the SoftwareDistribution directory
- Use Ethernet connection and disconnect USB devices
- Enable and disable RAID in BIOS
- Scan for Virus
- Boot into Safe Mode
- Create a new user account
- Use SFC and DISM Utilities
- Uninstall Recently Installed Applications
- Update Device Drivers
- Clean the Windows Registry
- Memory-related issues
- Clear Microsoft Store Cache
- Perform System Restore
Move your file to a different directory
- Find the file you are unable to access because of this error.
- Right-click on the file and select Cut from the menu
- Navigate to another directory.
- Right-click the image and select Paste.
- Follow the above steps and then move the file back to its original location.
Delete $ directories
- Open File Explorer.
- Go to the C Drive.
- Click on View to check Hidden files.
Use Ethernet connection and disconnect USB devices
- Ethernet connections are recommended to allow the update to be performed if possible.
- All non-essential USB devices must be disconnected
- After that, you can try again to update.
Enable and disable RAID in BIOS
- Restart your computer.
- Keep your eyes on F2 and Del while the PC boots.
- Locate the SATA Mode configuration, and ensure it isn’t set to RAID.
- You can save changes.
- Create a new user account
If none of the above options work or fail to produce the desired results you can create a new account. It is possible for system file corruption to get so severe that running the CHKDSK Command under CMD or entering safe mode might not be able to repair it. This problem can be solved by creating a new user account.
Update error 0xc19001e1 on Windows 11/10
What causes this Error 0xc19001e1 on Windows 11/10 PC?
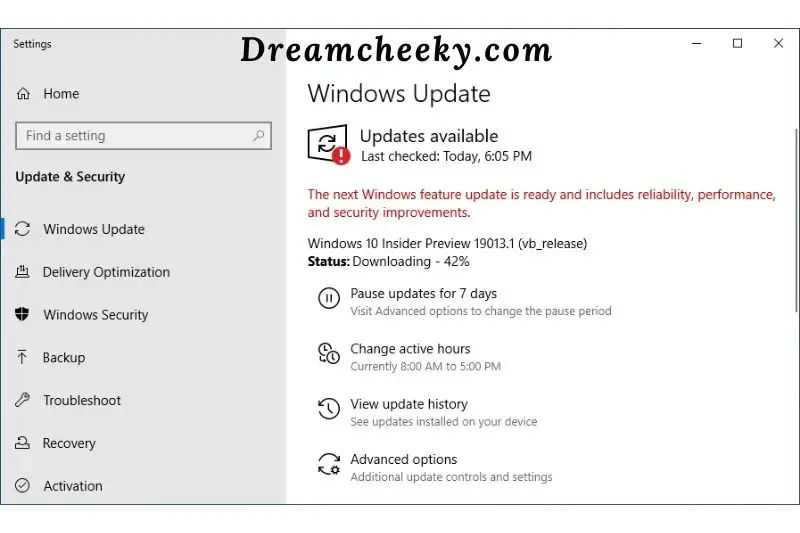
Windows Update Error Code 0xc19001e1 can be caused by corrupt system core files or bugs in the cumulative updates. This issue can be resolved by running the DISM health command or SFC utility. Try Update Troubleshooter. Uninstall any third-party antivirus and install the most recent patch update manually.
Reset Windows Update Services and Components if this fails. To fix error 0xc19001e1, you can use System Restore Point or clean install Windows 10.
Fix – Update error 0xc19001e1 on Windows 11/10

There is a common error that users are seeing when they try to update their Windows 11/10 operating system. The error is 0xc19001e1 and it can be frustrating because it doesn’t give you much information about what’s wrong. There are a few things that you can try to fix the problem, but if none of those work then you’ll need to contact Microsoft for support.:
- Check If Something’s Blocking the Update
- Run the Update Troubleshooter
- Restart the Update Components
- Check Your Disk for Errors
- Download the Updates Manually
- Run SFC command
- Update display driver
- Disable third-party anti-malware program
- Uninstall all unused device driver
- Restart Windows Update services
- Turn off Windows Defender Firewall
- Clean install Windows 10
- Clear Disk Space
Fix Error 0xC19001e2
Cause of error 0xC19001e2

This particular error code can be caused by several factors, according to extensive investigation. Here are some possible culprits.
Dell Encryption and Dell Data Security interference
If you are experiencing this problem on a Dell computer or laptop, it is likely that the interfering service provided by Dell Encryption/Dell Data Security programs is causing it. You will need to uninstall any supporting Dell software in order to fix this problem.
BitLocker interference
BitLocker has been known to cause problems with certain feature updates being installed on Windows 10. BitLocker interference – BitLocker is known to interfere with the installation of certain feature updates on Windows 10.
Common Windows Update glitch
According to many affected users, this problem is caused by a common glitch that Microsoft already knows about. The Windows Update Troubleshooter can be used to automatically fix the problem.
The WU process is in a limbo state
This error code can also be seen because some or all of the essential WU services are in a limbo. To fix this issue, you will need to reset all Windows Update components.
System file corruption
This is a rare, but possible, scenario that could lead to this problem. It is caused by system file corruption and affects the WU component. Multiple users have experienced the same issue and successfully used the Windows Update Agent to resolve the problem. You might have to run DISM and SFC scans in order to fix corrupted files in more severe circumstances.
How to fix update error 0XC19001E2

If you’re seeing the 0XC19001E2 error when you try to update your PC, it means that there’s a problem with the way your computer is trying to install the update:
- Deleting Dell Encryption and Dell Data Security (if applicable)
- Pause Bit-Locker (if applicable)
- Running the Windows Update Troubleshooter
- Running SFC and DISM Scans
- Using the Windows Update Assistant
- Perform Disk Cleanup
- Clear Windows Update Cache Folder
- Reset Windows Update Components
- Update Windows 10 Using Media Creation Tool
Deleting Dell Encryption and Dell Data Security (if applicable)
This issue may be occurring on any Dell laptop, ultrabook or computer. It could be caused by an incompatible service such as the Dell Encryption and Dell Data Security programs.
It turns out that there is a service shared by these two apps that can conflict with the installation 1903 feature update.
Several Dell users are also experiencing the 0XC19001E2 error code when trying to install a feature upgrade. They have confirmed that the problem has been resolved and that Windows Update is now available. After they uninstalled Dell Data Security and Dell Encryption, the process of installing Windows Update was completed.
If this is you, please follow these instructions to uninstall Dell Encryption or Dell Data Security. Also, ensure you don’t leave behind any remnant files.
- To open a Run dialog box, press the Windows key + R. Enter “appwiz.cpl” in the text box and hit the Enter key to open the Programs and Features menu.
- Click Yes to grant administrator access when you are prompted by the UAC.
- Scroll down to the Programs and Features menu and locate the problematic programs Dell Encryption or Dell Data Security.
- Once you have located them, right-click the first one and select Uninstall from the context menu. Follow the prompts on the screen to uninstall the first Dell support software.
- Once the first tool has been installed, you can continue the process with the rest until they are all removed.
- After both Dell Encryption & Dell Data Security have been uninstalled, navigate the following location to ensure that no leftover files are present that could interfere with the operation.
- C:Program Files x86DellDell data Protection
- Next, try again to trigger the 0XC19001E2 error.
This scenario is not applicable if you have uninstalled the Dell Support Software to no avail.
Pause Bit-Locker (if applicable)
Bitlocker is another common reason for the 0XC19001E2 error that can occur when you attempt to update a feature.
This feature allows you encryption of the entire system drive to protect personal files. However, it can sometimes interfere with certain Windows Updates.
Users who had experienced the same issue have all confirmed that it was resolved by temporarily suspending Bit-Locker, installing the update and then resuming encryption.
Follow these instructions to temporarily suspend BitLocker if you are using it on the affected computer.
- To open a Run dialog box, press Windows key + R. Next, in the text box type “control.exe” and hit Ctrl+ Shift+ Enter to open Control Panel with admin access. Click Yes to grant admin access at the UAC (User Account Control).
- Access the System and Security tab in the Control Panel window.
- Next, select BitLocker Drive Encryption from the System and Security Menu.
- Next, you will see a list listing all partitions. Click on the Turn off Bitlocker link and locate the affected drive. Next, click on Turn Off BitLocker to confirm the operation.
- Click Yes to grant administrator access when you are prompted with the UAC (User Account Control).
- Once BitLocker is disabled for the affected partition go ahead and try to install the pending upgrade again to see if it fixes the problem.
If BitLocker is not what you need, you can move on to the next possible fix.
Conclusion
We’ve pointed out the ways to fix upgrade errors on windows 10. Dreamcheeky Hopes that you can find helpful in this article. Thank you for reading.

